Ingest Geographical Data
In this guide we will ingest a list of locations from Wikidata: locations of higher education institutes in France. This process is similar to the steps that are described in the guides 'Create your own Gazetteer' and 'Import an Existing Gazetteer'.
Model
Before you ingest any data, you should check if your data model needs any adjustments. In this case we need a Type of Objects that has one Sub-Object to store spatial data. In the guide on storing locations you have seen that a Sub-Object allows you to store latitude and longitude data.
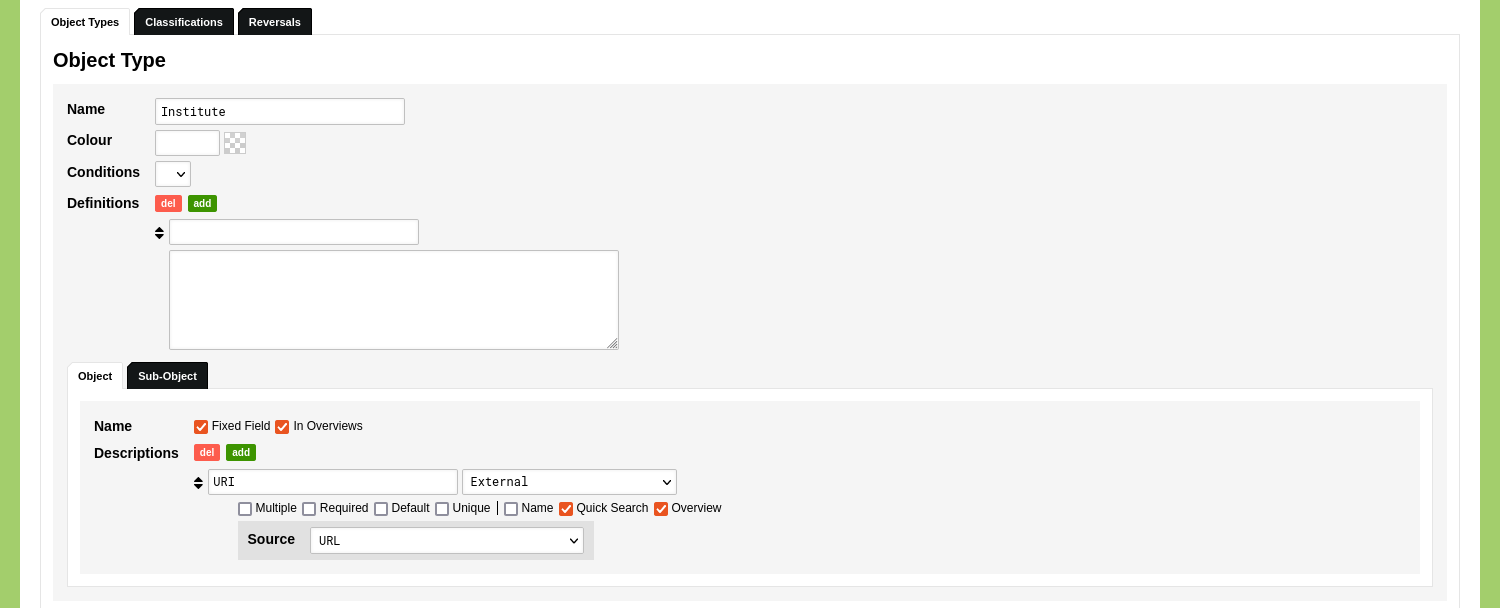
To make an Object Type for your locations, go to Model and go to the tab 'Object Types'. Click 'Add Object Type'. Enter the name of this Type in the 'Name' field. If you plan to use this Type of Objects for various kinds of locations you can give it a name like 'Place'. If you plan to store only institutes you can give it a name like 'Institute'.
Leave the 'Fixed Field' option for the Object Name checked so you can use a single input field for Object Names.
Specify an Object Description with the name 'URI' to be able to add a reference to the source of the data. Use the drop-down menu to set the value type of this Object Description to 'External'. Check the checkbox 'Quick Search' and 'Overview'. Read the guide on creating your first Object Type to learn more about these settings.
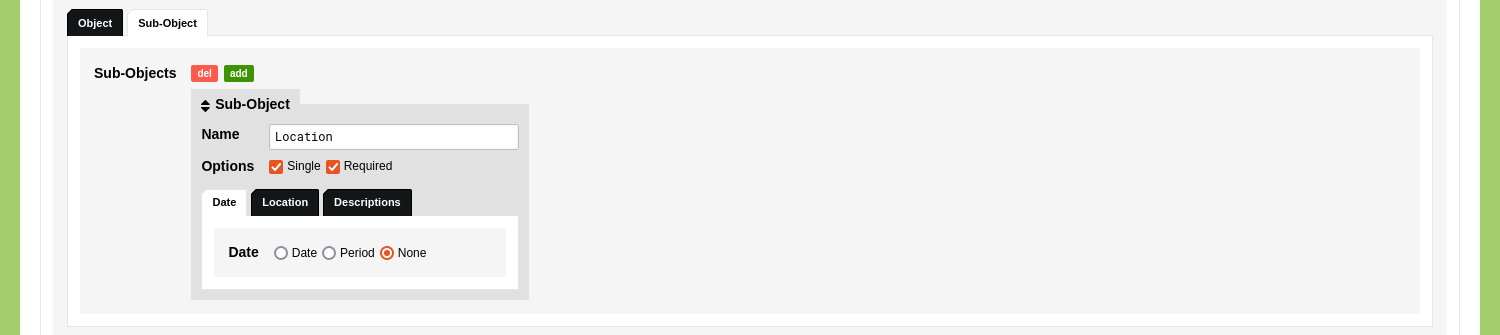
Switch to the tab 'Sub-Object' to define a Sub-Object for this Object Type. We need only one Sub-Object here as the Objects of this Type are essentially a pair of a name and a single spatial statement. Call the Sub-Object something like 'Location' and check the checkbox for the 'Single' option and for the 'Required' option. If you want to specify a period for when the location was in use, you can set the date option to 'Period'. If you want to use the locations without specifying any kind of temporality, you can set the date option to 'None'.
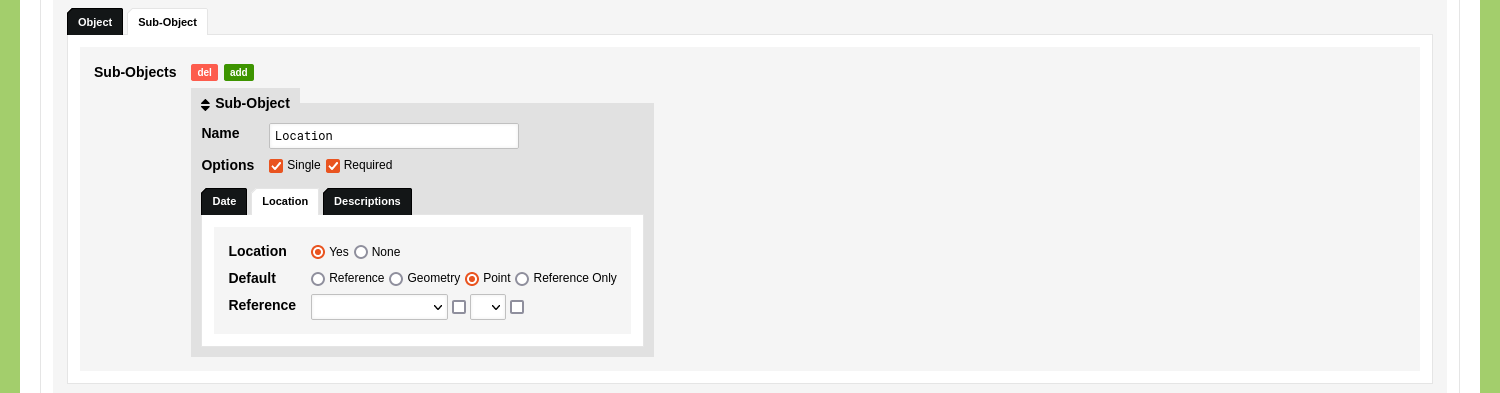
Open the tab 'Location' to specify the default location value of this Sub-Object. As Wikidata will provide a latitude and longitude value for every institute, you can set this to 'Point'.
Click 'Save Object Type'. Go to Management and select 'Projects'. Add a new project, or edit an existing one, in order to be able to work with this new Object Type. Enable the newly created Object Type in your project.
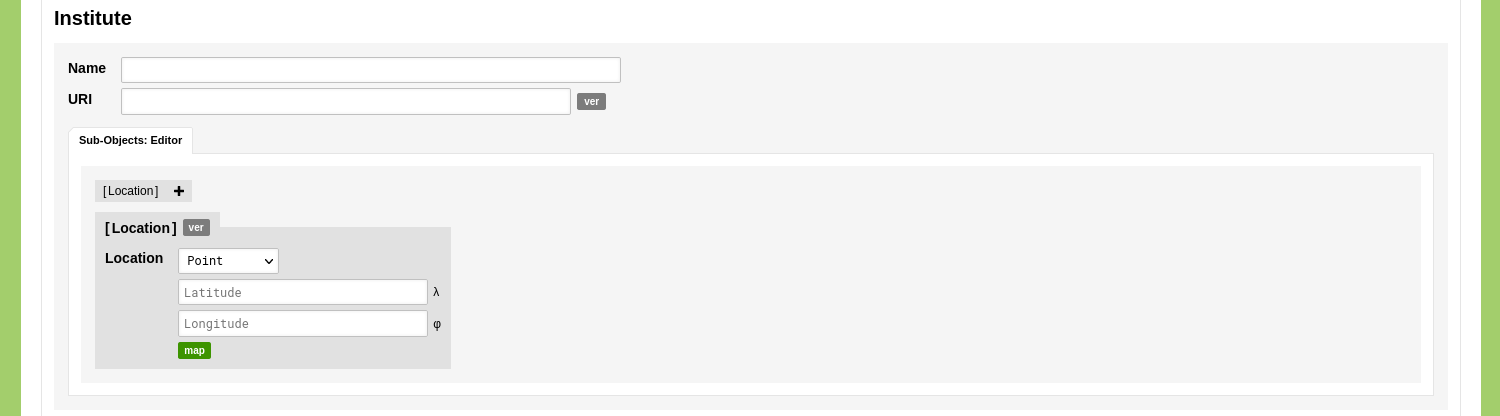
Go to the Data section of your environment and select the Object Type you just made to check if everything has been configured correctly. Click 'Add Institute' to open the data entry form and verify that the fields that will host the new data are present.
Linked Data Resource
The second thing to set up before we can run an Ingestion Process is a Linked Data Resource. This resource allows you to specify a configuration that establishes a link to an external resource. This configuration can be a simple query, but can also include interactive elements to query the external resource based on values stored in your nodegoat environment (e.g. query a library database based on VIAF identifiers of authors). This guide will focus on the basic steps of setting up a simple query, the next guides will cover interactive configurations.
Go to Model and go to 'Linked Data'. Click 'Add Linked Data Resource' and give the resource a name like 'Wikidata Institutes'. Enter the request URL 'https://query.wikidata.org/sparql?query=' in the 'URL' input field and enter '&format=json' in the 'URL Options'. Leave the 'URL Headers' empty.
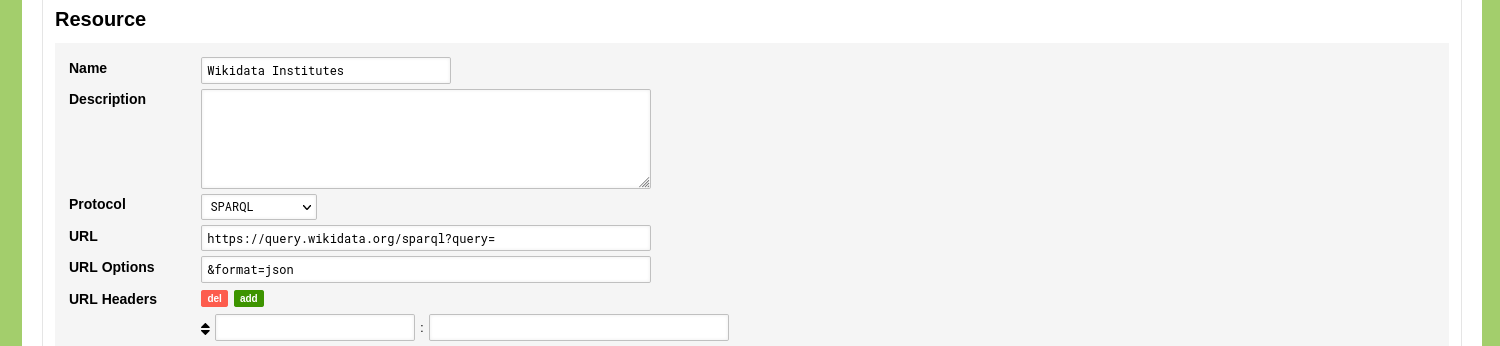
The specified URL provides nodegoat with the location of the SPARQL endpoint that will be queried. The URL options allows you to specify any options that will be added to the request URL.
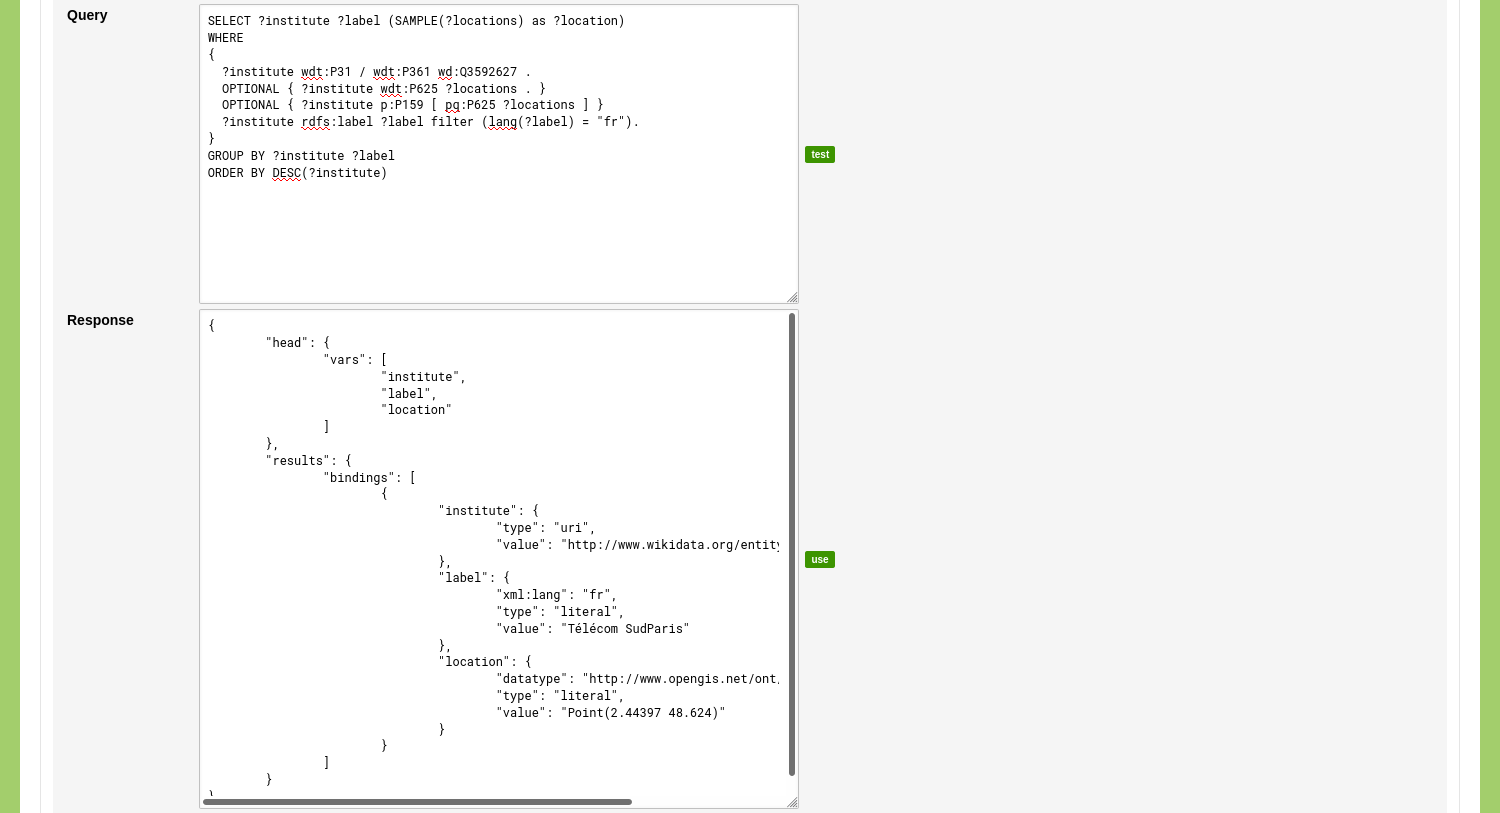
Paste the following SPARQL query in the 'Query' input field:
SELECT ?institute ?label (SAMPLE(?locations) as ?location)
WHERE
{
  ?institute wdt:P31 / wdt:P361 wd:Q3592627 .
  OPTIONAL { ?institute wdt:P625 ?locations . }
  OPTIONAL { ?institute p:P159 [ pq:P625 ?locations ] }
  ?institute rdfs:label ?label filter (lang(?label) = "fr").
}
GROUP BY ?institute ?label
ORDER BY DESC(?institute)
This query returns a list of higher education institutes in France with a French label for their name and a single location. To produce this list in which every row is a unique combination of one institute, one label and a single location, the SAMPLE aggregation function is used. Click here to view a commented version of this query.
Click the green 'test' button to run the query. This action will combine the values in the 'URL' field, the 'URL options' field and the 'Query' field and will result in the following request:
https://query.wikidata.org/sparql?query=SELECT%20%3Finstitute%20%3Flabel%20%28SAMPLE%28%3Flocations%29%20as%20%3Flocation%29%0AWHERE%20%0A%7B%0A%20%20%3Finstitute%20wdt%3AP31%20%2F%20wdt%3AP361%20wd%3AQ3592627%20.%0A%20%20OPTIONAL%20%7B%20%3Finstitute%20wdt%3AP625%20%3Flocations%20.%20%7D%0A%20%20OPTIONAL%20%7B%20%3Finstitute%20p%3AP159%20%5B%20pq%3AP625%20%3Flocations%20%5D%20%7D%0A%20%20%3Finstitute%20rdfs%3Alabel%20%3Flabel%20filter%20%28lang%28%3Flabel%29%20%3D%20%22fr%22%29.%0A%7D%20%0AGROUP%20BY%20%3Finstitute%20%3Flabel%0AORDER%20BY%20DESC%28%3Finstitute%29&format=jsonYou can copy and paste this in the URL bar of your browser to inspect the results.
After the query has run, the results are shown in the 'Response' input field. This field allows you to inspect the results and to verify that all specified variables have been returned. By clicking the green 'use' button, the returned data populates the mapping options.
After the 'use' button is clicked, you can select the position in the returned data that contains the URI. To do this, change the dropdown menu next to the label 'URI' to: {"results":{"bindings":{"[]":{"institute":{"value":""}}}}}.
Do the same for the label: change the dropdown menu next to the label 'Label' to: {"results":{"bindings":{"[]":{"label":{"value":""}}}}}.
To process the location value we add a custom key/value pair. Enter the name for the key: 'Location'. Change the dropdown menu for this value to: {"results":{"bindings":{"[]":{"location":{"value":""}}}}}.

Click 'Save Linked Data Resource' to store this configuration.
Ingestion Process
You are now ready to configure the Ingestion Process. Enable these processes by going to Management and select 'Projects'. Edit your project and enable the System Process 'Ingestion'.

Go to the Data section of your environment. Go to the tab 'Processes', click 'Ingestion', and click 'Add Ingestion'.
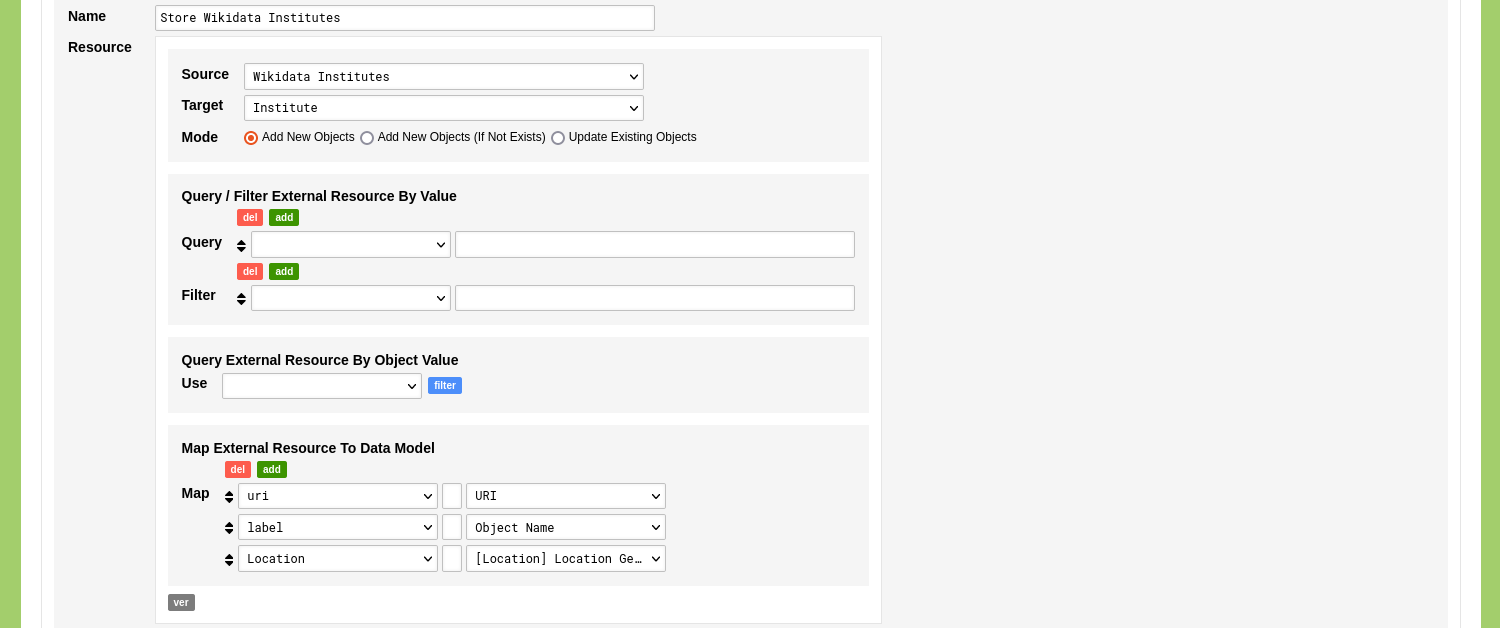
Give the Ingestion Process a name like 'Store Wikidata Institutes'. Use the dropdown menu with the label 'Source' to select the Linked Data Resource 'Wikidata Institutes'. Use the dropdown menu with the label 'Target' to select the Object Type 'Institute'. Since we are adding new Objects you can leave the mode of the Ingestion Process to 'Add New Objects'.
Because the query in the Linked Data Resource has no interactive elements, you can disregard the form sections 'Query / Filter External Resource By Value' and 'Query External Resource By Object Value'.
Use the form section 'Map External Resource To Data Model' to connect the returned variables to elements in the selected Object Type. In this case you connect the variable 'URI' to the Object Description 'URI'. You connect the variable 'Label' to the Object Name. You connect the variable 'Location' to the Geometry of the 'Location' Sub-Object ('[Location] Location Geometry').
Click 'Save Ingestion'.
You now see the newly created Ingestion Process listed in your overview of Ingestion Processes. Click the green 'run' button on the right side of this overview to run this Ingestion Process.
The Linked Data Resource you used to create this Ingestion Process has been pre-selected in the dropdown menu. In case you want to run this Ingestion Process with another Linked Data Resource, you can use the dropdown menu to select a different Linked Data Resource.
Click 'Run Ingestion' to run the Ingestion Process. The Ingestion Process runs and informs you about the results. If everything went correctly you now have ingested new Objects of the Type 'Institute'. Open the Type 'Institute' to see the newly ingested Objects. You can run the Geographical Visualisation to visually explore the ingested data.
