Ingest Biographical Data
In this guide we will ingest a set of people from Wikidata: people who have studied at one or more of the institutes that were ingested in the guide 'Ingest Geographical Data'. The most straightforward way to do this is by running two separate queries. One query establishes a list of unique people who have studied at one of the aforementioned institutes. Another query will produce a list of links between the selected people and the respective institutes. This two-step approach ensures that no doubling occurs when ingesting people who have studied at multiple institutes.
Model
To store this data we need an Object Type that allows us to store people who have a Sub-Object that can express multiple education relationships situated in time and space. You can do this by expanding the data model created in the guide 'Create your first Object Type', or by following the steps below.
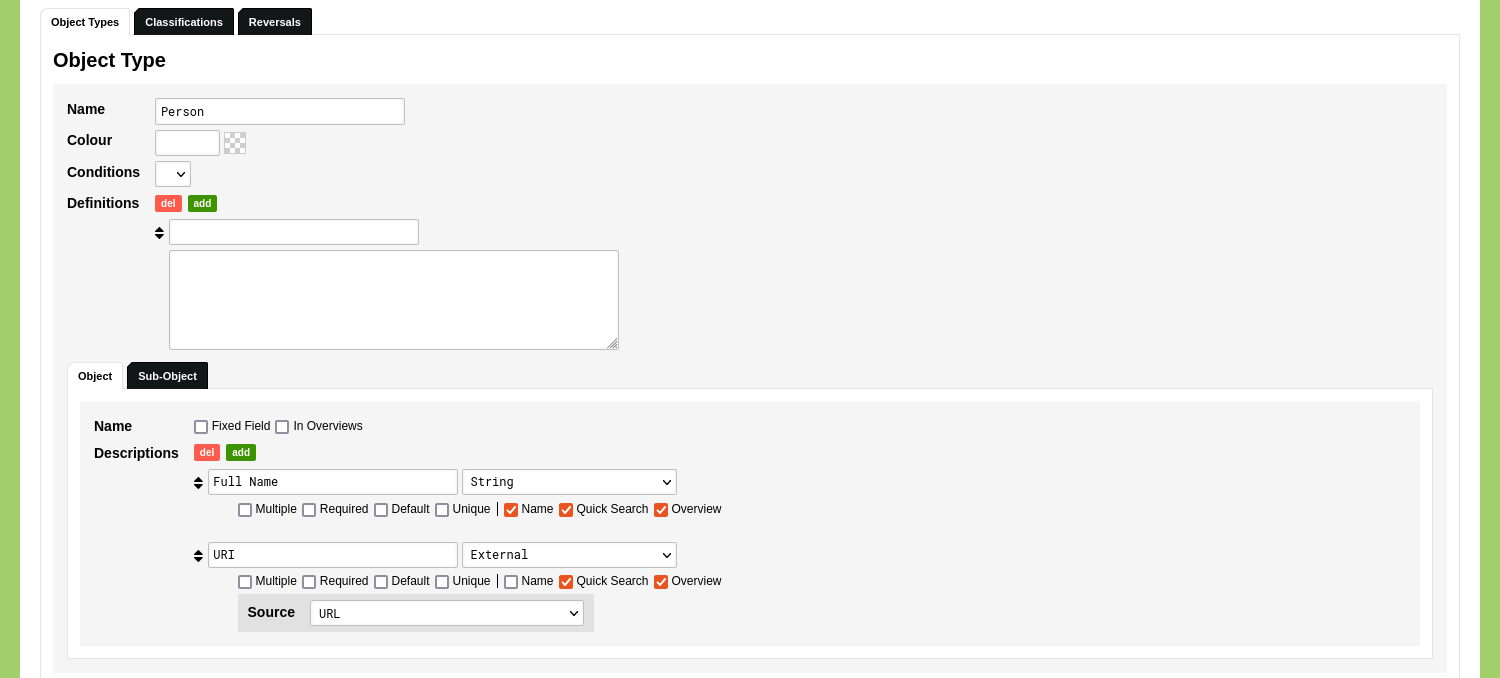
To make an Object Type for people, go to Model and go to the tab 'Object Types'. Click 'Add Object Type'. Enter the name of this Type in the 'Name' field: 'Person'.
Uncheck the 'Fixed Field' and 'In Overviews' options for the Object Name, as we will generate the Object Name based on Object Descriptions. Read the guide on creating your first Object Type to learn more about these settings.
Specify two Object Description and name them 'Full Name' and 'URI'. The 'Full Name' Object Description will host the label of each person provided by Wikidata. The 'URI' Object description allows you to add a reference to the source of the data.
For the 'Full Name' Object Description: keep the value type set to 'String'. Check the checkbox 'Name', 'Quick Search', and 'Overview'. With these settings in place, the value of this Object Description will be used as the Object Name, the data stored in this Object Description will be used in Quick Search actions, and the data will be shown in the overview of Objects.
For the 'URI' Object Description: use the drop-down menu to set the value type of this Object Description to 'External'. Check the checkbox 'Quick Search' and 'Overview'. With these settings in place, the data stored in this Object Description will be used in Quick Search actions, and the data will be shown in the overview of Objects.
Switch to the tab 'Sub-Object' to define a Sub-Object. Call the Sub-Object something like 'Education'. Set the date option to 'Period'.

Open the tab 'Location' to specify the default location value of this Sub-Object. The location will be provided by the latitude and longitude values stored in the Object Type 'Institute'. We will make a reference to this Object Type so we can re-use these values. Set the default location value to 'Reference' and select the Object Type 'Institute' and Sub-Object 'Location'.

Click 'Save Type' to save your Object Type.
Optional References
The data model is now able to host all incoming data. We can add an additional reference so we can easily explore links between people and institutes. To do this, click the blue 'edit' button at the Type 'Person', go to the tab Sub-Objects, and open the tab 'Descriptions'. Add a Sub-Object Description with the name 'Institute'. Set the value type to 'Reference: Object Type' and select the Object Type 'Institute'.

Click 'Save Type' to save your Object Type.
Even though this Object Type is now ready to be used, we will edit it one more time to enable re-usage of data. To do this, click the blue 'edit' button at the Object Type 'Person' an go to the tab Sub-Objects. Open the tab 'Location' to and change the default location value to 'Reference Only'. Check the checkboxes next to the selected Object Type and Sub-Object ('Lock this part of the location reference at Object level.'). A new 'Source' option will appear. Select 'Sub-Object Description' and select 'Institute'. With these settings in place, you only need to select the Institute once and it will be used both for the Reference in the Sub-Object Descriptions as well as for the Location Reference.

Click 'Save Type' to save your Object Type.
Linked Data Resources
We will create two Linked Data Resources for the two queries mentioned above: 'Wikidata Education' and 'Wikidata People'.
Wikidata Education
Go to Model and go to 'Linked Data'. Click 'Add Linked Data Resource' and give the first resource a name like 'Wikidata Education'. Enter the request URL 'https://query.wikidata.org/sparql?query=' in the 'URL' input field and enter '&format=json' in the 'URL Options'. Leave the 'URL Headers' empty.

The specified URL provides nodegoat with the location of the SPARQL endpoint that will be queried. The URL options allows you to specify any options that will be added to the request URL.
Paste the following SPARQL query in the 'Query' input field:
SELECT DISTINCT ?person ?institute ?start_date ?end_date
WHERE {
?person p:P69 ?education .
?education ps:P69 ?institute ;
pq:P580 ?start_date ;
pq:P582 ?end_date.
?institute wdt:P31 / wdt:P361 wd:Q3592627 .
?person rdfs:label ?label filter (lang(?label) = "fr").
}
ORDER BY ?person
This query returns a list of people together with their education at a higher education institutes in France, including a start and end date. Click here for a commented version of this query.
Click the green 'test' button to run the query. This action will combine the values in the 'URL' field, the 'URL options' field and the 'Query' field.
After the query has run, the results are shown in the 'Response' input field. This field allows you to inspect the results and to verify that all specified variables have been returned. By clicking the green 'use' button, the returned data populates the mapping options.
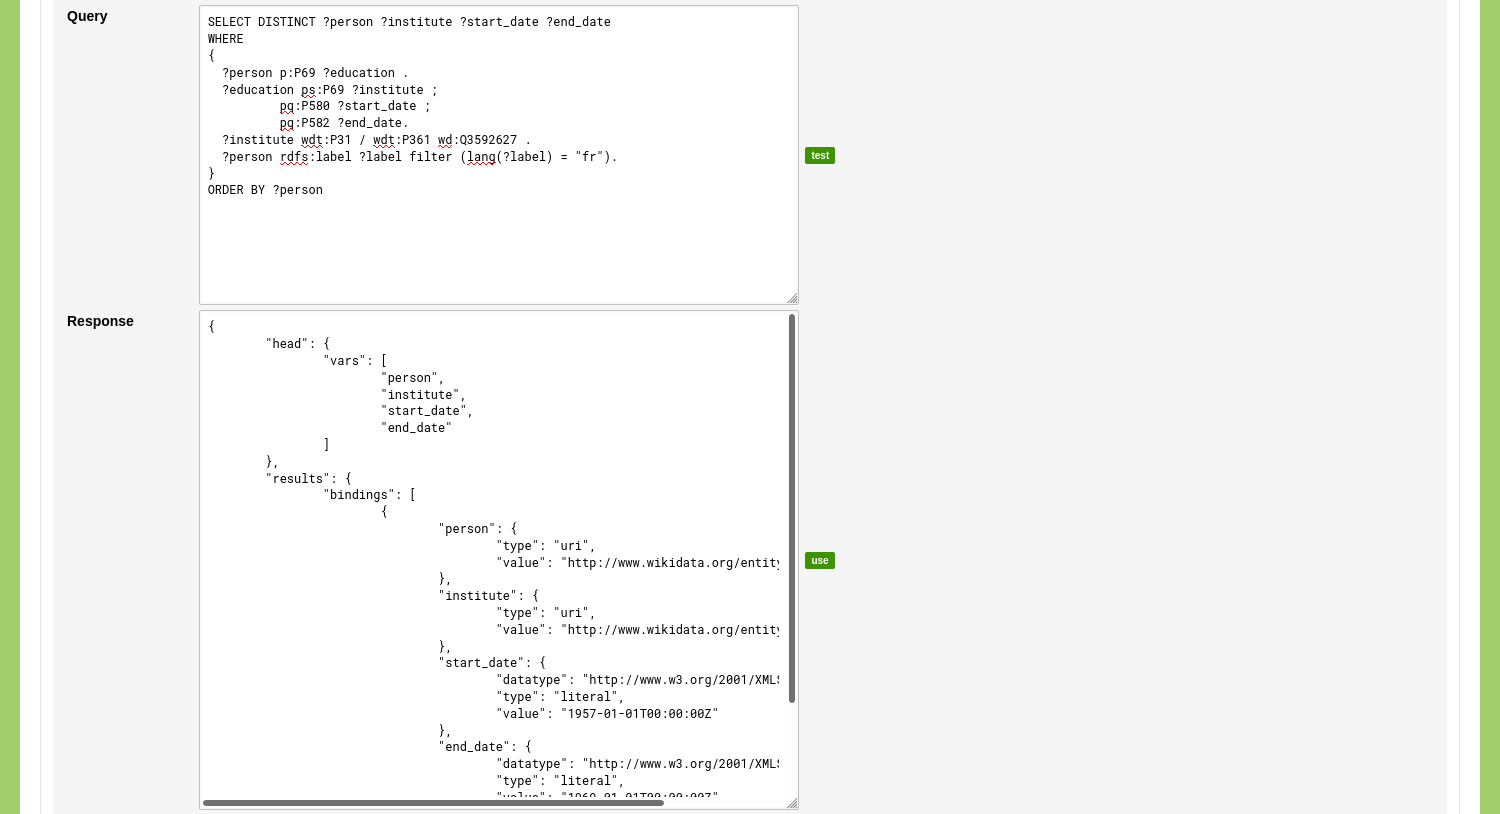
After the 'use' button is clicked, you can select the position in the returned data that contains the URI. To do this, change the dropdown menu next to the label 'URI' to: {"results":{"bindings":{"[]":{"person":{"value":""}}}}}.
Do the same for the label: change the dropdown menu next to the label 'Label' to: {"results":{"bindings":{"[]":{"person":{"value":""}}}}}. As this query does not return a label, we use the URI as a placeholder.
To process the institute value and the dates we add three custom key/value pairs. Click the green 'add' button next to the 'Values' label twice. Enter the name for the first key: 'Institute'. Change the dropdown menu for this value to: {"results":{"bindings":{"[]":{"institute":{"value":""}}}}}. Enter the name for the second key: 'Start Date'. Change the dropdown menu for this value to: {"results":{"bindings":{"[]":{"start_date":{"value":""}}}}}. Enter the name for the third key: 'End Date'. Change the dropdown menu for this value to: {"results":{"bindings":{"[]":{"end_date":{"value":""}}}}}.

Click 'Save Linked Data Resource' to store this configuration.
Linked Data Conversion
The Linked Data Resource we have created is now configured to query the Wikidata endpoint and to obtain the results of this query. The date format used by Wikidata (yyyy-mm-ddThh:mm:ssZ, e.g.: 1957-01-01T00:00:00Z), displayed in the 'Response', input field is not compatible with the date format used by nodegoat (dd-mm-yyyy, e.g. 01-01-1957). To fix this, we can run a 'Linked Data Conversion' script on the data that will be ingested.
Go to the tab 'Conversions' and click 'Add Linked Data Conversion'. Enter a name like 'yyyy-mm-dd to dd-mm-yyyy' and a description of the script. Enter the input data in the 'INPUT =' input field: 1957-01-01T00:00:00Z. Enter the following JavaScript code in the 'Script' input field.
const date = new Date(INPUT);
const day = date.getUTCDate();
const month = date.getUTCMonth() + 1;
const year = date.getUTCFullYear();
var OUTPUT = {'date': day+'-'+month+'-'+year};
This script converts the input value to a new JavaScript Date Object and splits this into three separate variables. These are then regrouped in a new Object. Click the green 'test' button to test this script.
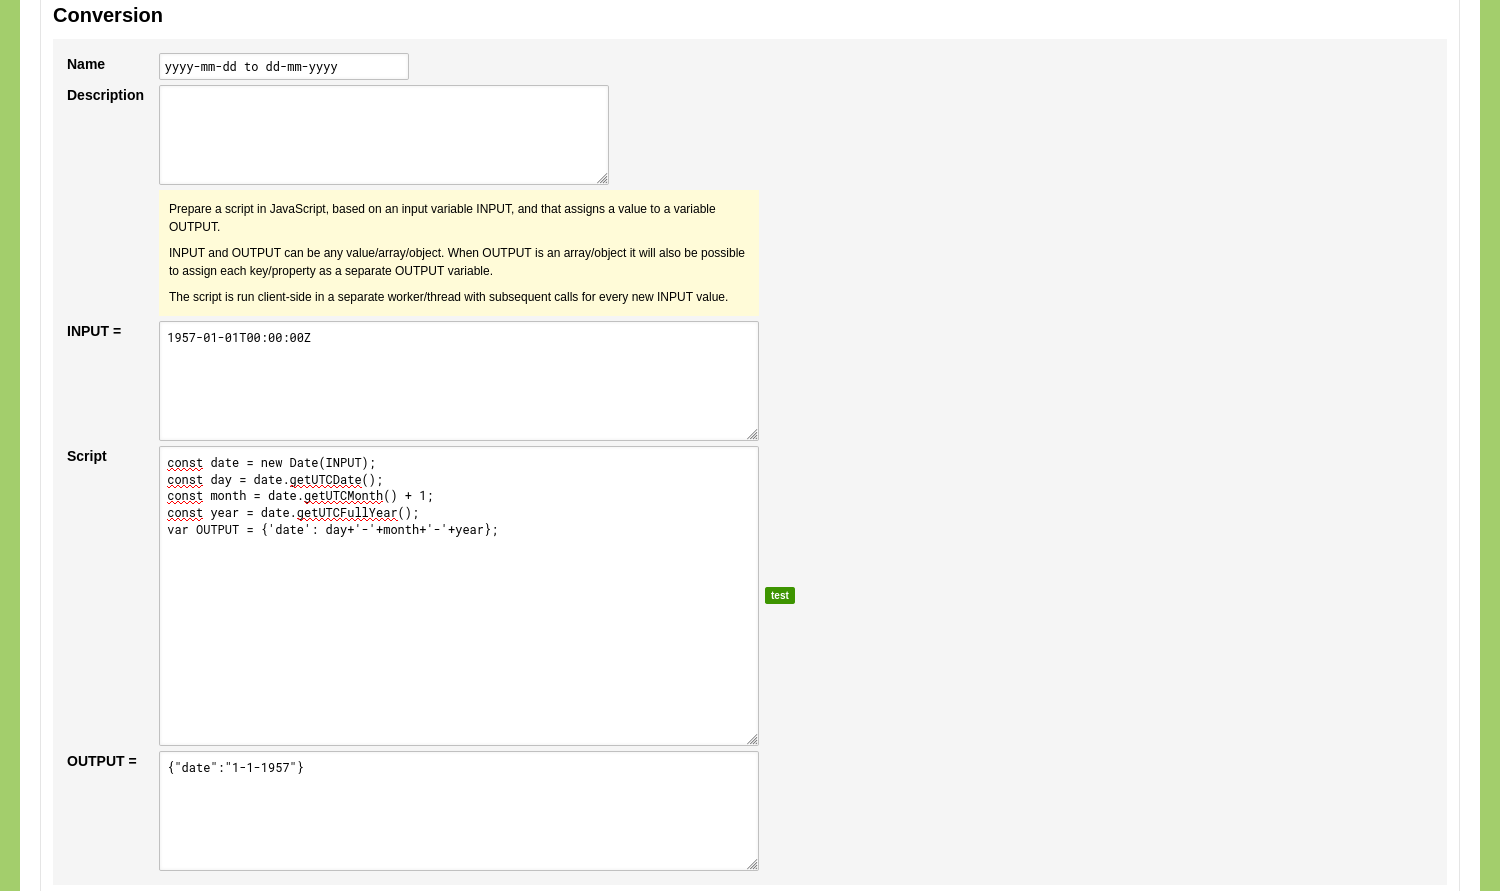
If the output is correct you can click 'Save Linked Data Conversion'.
Go to the tab 'Resources' and click the blue 'edit' button at the resource 'Wikidata Education'. Scroll down to the custom key/value pairs and select the newly created Linked Data Conversion scripts as well as the generated output in the dropdown menus shown below the 'Date Start' and 'Date End' values.

Click 'Save Linked Data Resource' to store this configuration.
Wikidata People
Create a new Linked Data Resource for the query that will produce the list of unique people. Give this resource the name 'Wikidata People'. Use the same settings as the for the resource 'Wikidata Education', and use the following query:
SELECT DISTINCT ?person ?label
WHERE {
?person p:P69 ?education .
?education ps:P69 ?institute ;
pq:P580 ?start_date ;
pq:P582 ?end_date.
?institute wdt:P31 / wdt:P361 wd:Q3592627 .
?person rdfs:label ?label filter (lang(?label) = "fr").
}
ORDER BY ?person
After you have clicked the 'test' and 'use' buttons, set the 'URI' dropdown menu to {"results":{"bindings":{"[]":{"person":{"value":""}}}}} and set the 'Label' dropdown menu to {"results":{"bindings":{"[]":{"label":{"value":""}}}}}.
Click 'Save Linked Data Resource' to store this configuration.
Ingestion Processes
Ensure that you have the newly created Object Type as well as the Ingestion Processes enabled in you project by going to Management and select 'Projects'. Edit your project and enable the System Process 'Ingestion' as well as the Object Type 'Person'.
We will create two Ingestion Processes: 'Store Wikidata People' and 'Store Wikidata Education'.
Store Wikidata People
Go to the Data section of your environment. Go to the tab 'Processes', click 'Ingestion', and click 'Add Ingestion'.
Give the Ingestion Process a name like 'Store Wikidata People'. Use the dropdown menu with the label 'Source' to select the Linked Data Resource 'Wikidata People'. Use the dropdown menu with the label 'Target' to select the Object Type 'Person'. Since we are adding new Objects you can leave the mode of the Ingestion Process to 'Add New Objects'.
Because the query in the Linked Data Resource has no interactive elements, you can disregard the form sections 'Query / Filter External Resource By Value' and 'Query External Resource By Object Value'.
Use the form section 'Map External Resource To Data Model' to connect the returned variables to elements in the selected Object Type. In this case you connect the variable 'URI' to the Object Description 'URI'. You connect the variable 'Label' to the Object Description 'Full Name'.
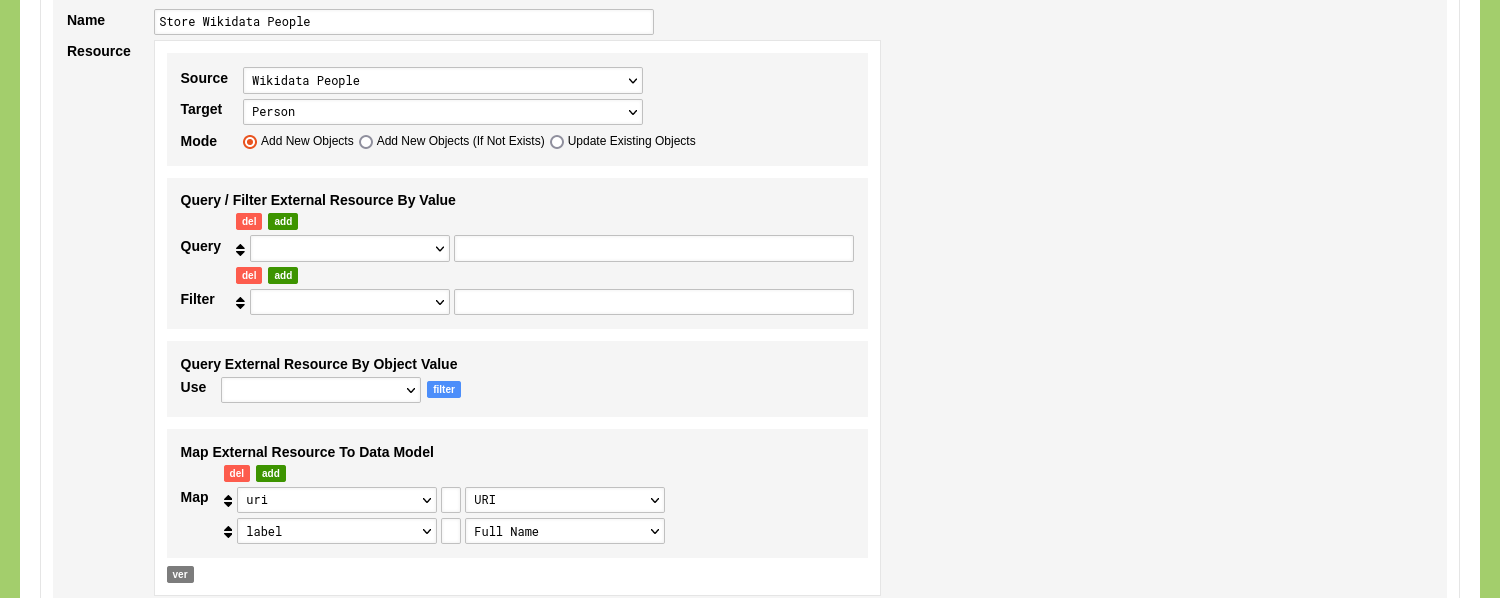
Click 'Save Ingestion'.
You now see the newly created Ingestion Process listed in your overview of Ingestion Processes. Click the green 'run' button on the right side of this overview to run this Ingestion Process.
The Linked Data Resource you used to create this Ingestion Process has been pre-selected in the dropdown menu. In case you want to run this Ingestion Process with another Linked Data Resource, you can use the dropdown menu to select a different Linked Data Resource.
Click 'Run Ingestion' to run the Ingestion Process. The Ingestion Process runs and informs you about the results. If everything went correctly you now have ingested new Objects of the Type 'Person'. Open the Type 'Person' to see the newly ingested Objects.
Store Wikidata Education
Go to the Data section of your environment. Go to the tab 'Processes', click 'Ingestion', and click 'Add Ingestion'.
Give the Ingestion Process a name like 'Store Wikidata Education'. Use the dropdown menu with the label 'Source' to select the Linked Data Resource 'Wikidata Education'. Use the dropdown menu with the label 'Target' to select the Object Type 'Person'. This process will update the previously ingested Objects, so change the mode to 'Update Existing Objects'.
Disregard the 'Query / Filter External Resource By Value' form section.
Use the form section 'Link External Resource To Object' to establish a link between the returned data and the data already present in your nodegoat environment. Set 'Identify Objects By' to 'Filter' and use the first dropdown menu ('Result value from the Linked Data query.') to select the returned URI from your query. Use the second dropdown menu ('Target Element in Data Model.') to select the 'URI' Object Description. With these settings in place, the Ingestion Process will create a filter for each returned URI to identify an Object of the Type 'Person'.
Use the form section 'Map External Resource To Data Model' to connect the returned variables to elements in the selected Object Type. In this case you connect the variable 'Institute' to the Sub-Object Description '[Education] Institute'. The referenced Object Type appears and you can use the dropdown menu 'Element that will be used to make a Reference. If left blank, Quicksearch Descriptions will be used.' to select the 'URI' Object Description. This will be used to identify the Institutes in your environment by means of the returned URI.
You connect the variable 'Date Start' to '[Education] Date Start' and the variable 'Date End' to '[Education] Date End'.
Set 'uri' and 'label' to empty values and use the red 'del' button to remove them.
With these settings in place, the Ingestion Process will update every Object that has a match with a URI of the returned data with an 'Education' Sub-Object. This Sub-Object will be given a Start Date and End Date as well as a reference to an institute.
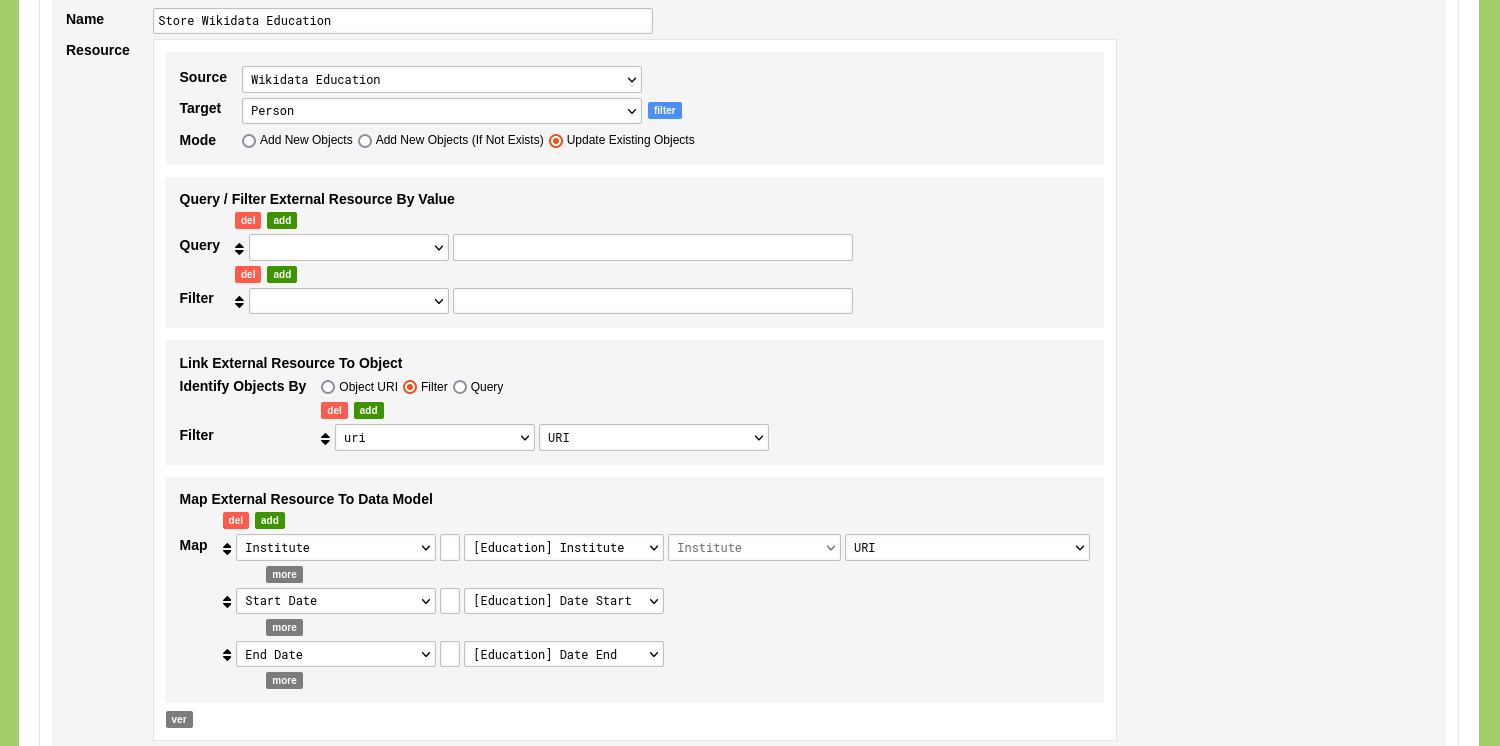
Click 'Save Ingestion'.
You now see the newly created Ingestion Process listed in your overview of Ingestion Processes. Click the green 'run' button on the right side of this overview to run this Ingestion Process.
Click 'Run Ingestion' to run the Ingestion Process. The Ingestion Process runs and informs you about the results. If any reference could not be established automatically, the Ingestion Process pauses and allows you to decide how to handle the ambiguous reference.
If everything went correctly you now have updated the Objects of the Type 'Person'. Open the Type 'Person' to see the updated Objects.
Appendix: Explore the Ingested Data
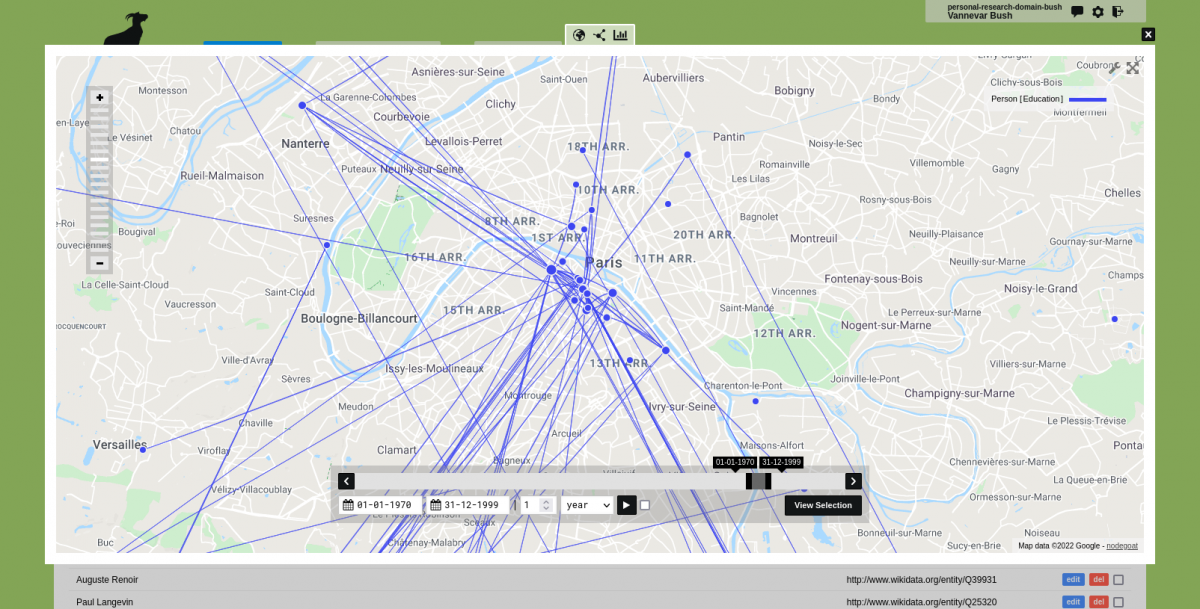
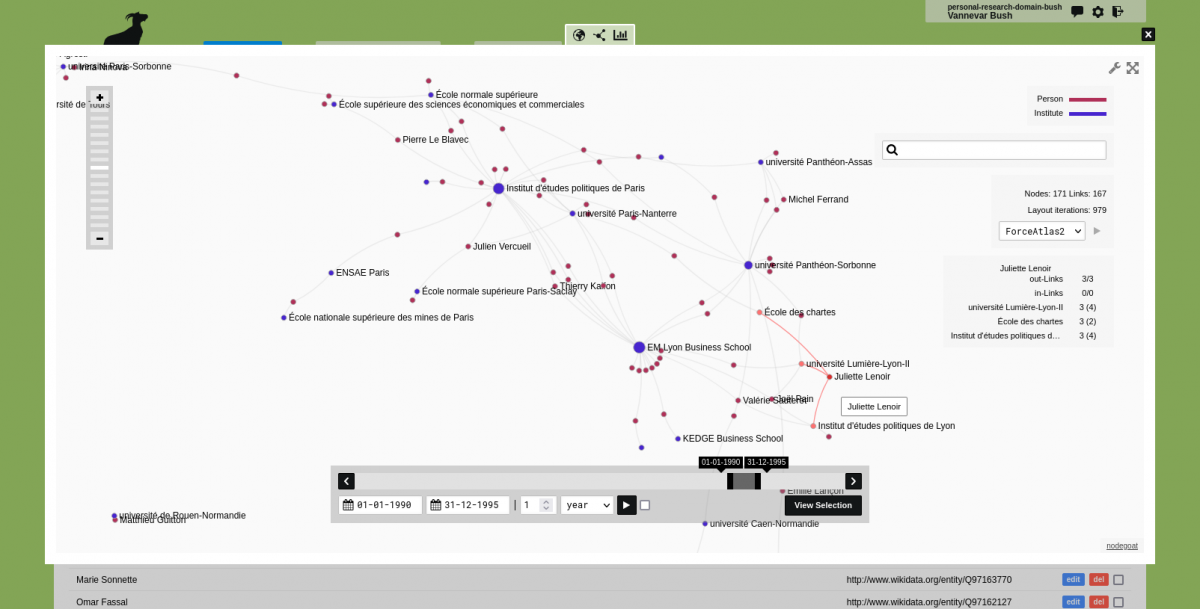
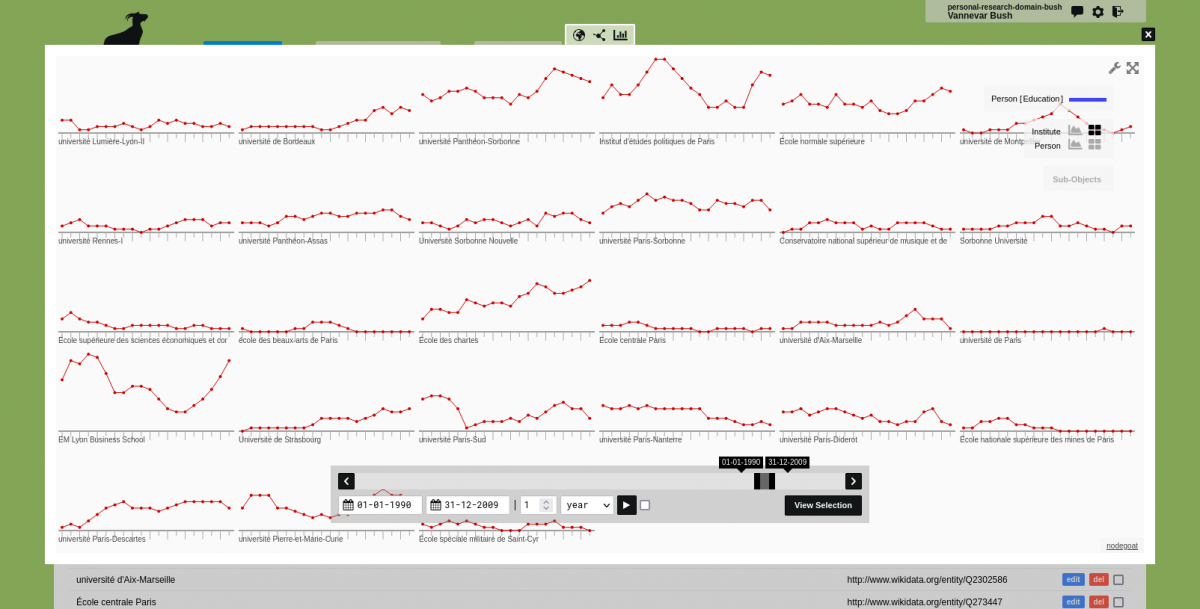
Now that you have ingested this data, you can use the various filter, analysis, and visualisation functionalities of nodegoat to explore the ingested data. Some examples are listed below.
