Import an existing Gazetteer
Using existing gazetteers is a good way to quickly geocode your data. You can use gazetteers that consist of present day data, or you can use gazetteers that describe historical locations. This guide will demonstrate how spatial data can be imported into nodegoat and how you can use this to geocode your own data.
Present day gazetteers can be found at places like GeoNames.org or at the National Geospatial-Intelligence Agency, for example. The Type 'City' which is available in your research environment on nodegoat.net is a subset of GeoNames data, more specifically the 'cities5000.zip' file that is available here.
The field of Historical GIS has produced a number of rich spatial resources. Excellent examples are the Pleiades gazetteer of ancient places and the HGIS de las Indias. Both of these projects have made their data available as downloadable resources that you can incorporate in your research project. Make sure to use the correct citation when using a resource like this.
This guide will import a historical gazetteer of Ukraine, that has been created in the framework of the OpenOttoman project at Marquette University. The 'Gazetteer of Beauplan’s Ukraine' is based on maps and publications of Guillaume Le Vasseur, sieur de Beauplan. You can find more information and download the data from the project repository.
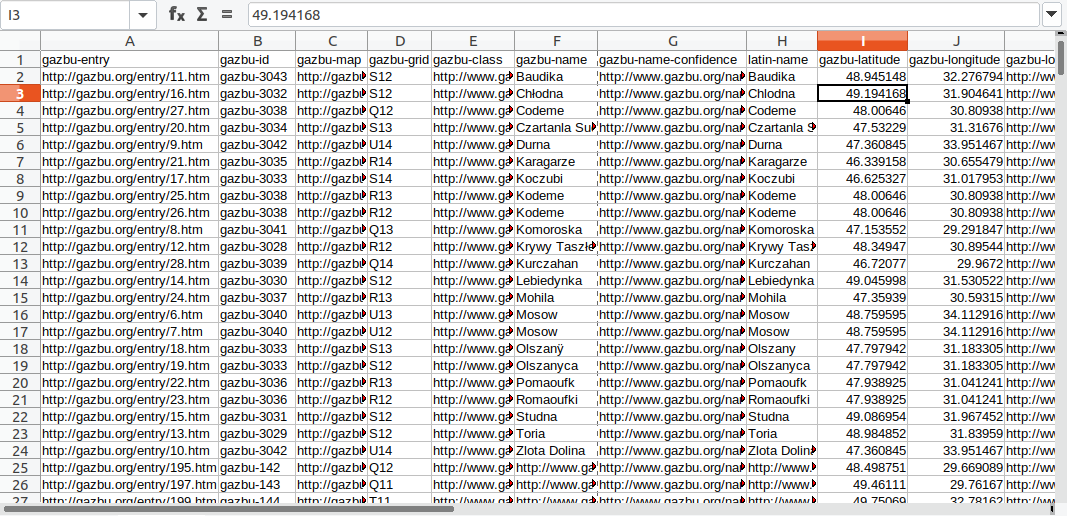
Download the zip file from the repository and extract the CSV file. Open the CSV file in any spreadsheet application to inspect the data. The columns 'gazbu-latitude' and 'gazbu-longitude' contain the spatial statements of this gazetteer. For this gazetteer every row in the CSV file will become an Object in your nodegoat environment.
Data Model
To be able to import this data in nodegoat, you need to make sure that your data model is able to host the data of this gazetteer. You can use a similar model that was created in the guide on creating a gazetteer, but we need to add some additional Object Descriptions to be able to store a reference to the data source and license information. If you want to store all the data that has been gathered in this gazetteer, you can expand the data model even further.
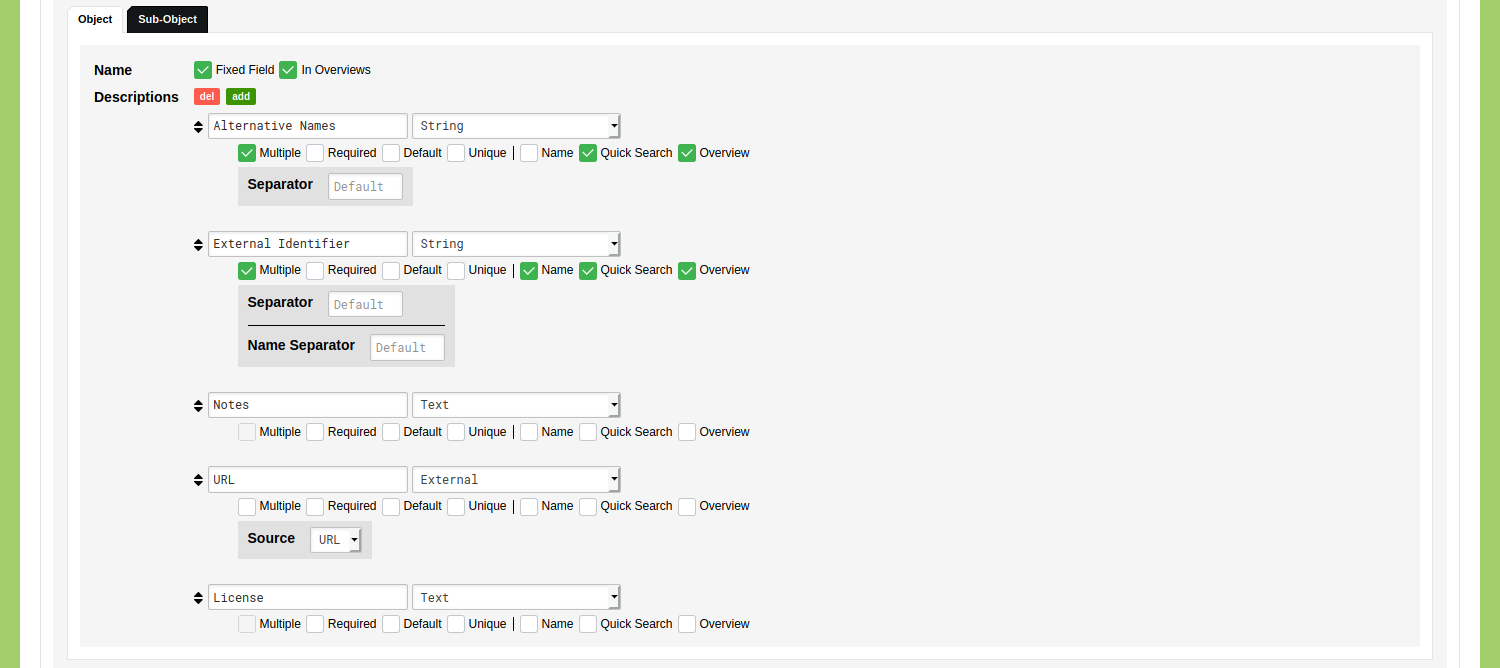
Go to Model and go to the tab 'Object Types', either edit the Object Type 'Place' or add a new Object Type by clicking 'Add Object Type'. Click the green 'add' button next to the label 'Descriptions' to add additional Object Descriptions. In addition to the Object Descriptions 'Alternative Names', and 'Notes', we need at least three more: 'External Identifier', 'URL', and 'License'. Check the 'Multiple', 'Name', 'Quick Search', and 'Overview' checkboxes for the 'External Identifier' Object Description. Use the dropdown menu of the 'URL' Object Description to set its data type to 'External', and set the data type of the 'License' Object Description to 'Text'. If the gazetteer you are importing has been published as Linked Open Data, you could change 'URL' to 'URI'.
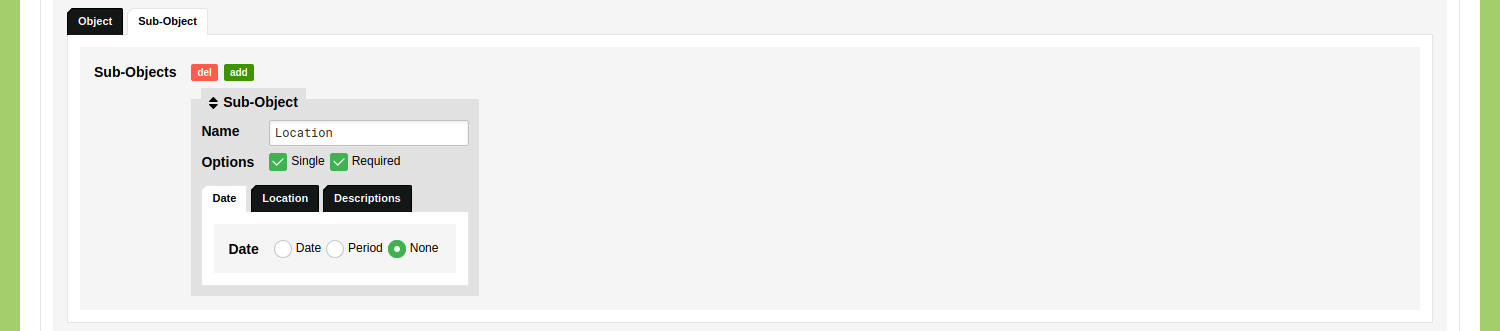
The settings for the Sub-Object do not need to be changed, as we still only need one Sub-Object that will contain one spatial statement per location. If you did not make a Sub-Object yet, set this to 'Single' and 'Required', and set the Date to 'None'.
Click 'Save Object Type'.
Import
Go to Model and go to Import. Open the tab 'CSV Files' and click 'Add CSV File'. Give the file the name 'GBU - Gazetteer of Beauplan’s Ukraine'. You can add a description for your own reference about where the data came from. Locate the CSV file on your hard-drive and click 'Save CSV File'.

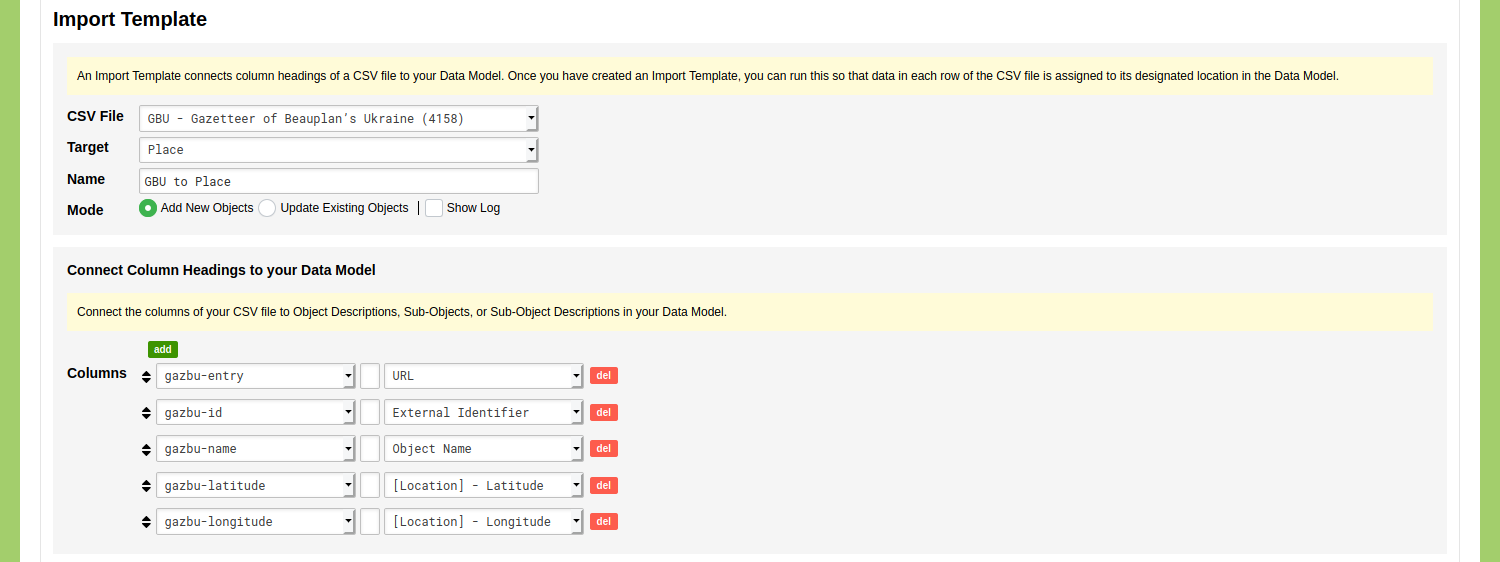
Go to the tab 'Import Templates' and click 'Add Import Template'. Use the top dropdown menu to select the CSV file 'GBU - Gazetteer of Beauplan’s Ukraine'. Select the Object Type 'Place' as the target of this Import Template. Give this Import Template the name 'GBU to Place' and leave the Mode to 'Add New Objects'.
Set the column 'gazbu-entry' to 'URL', 'gazbu-id' to 'External Identifier', 'gazbu-name' to 'Object Name', 'gazbu-latitude' to '[Location] - Latitude', and 'gazbu-longitude' to '[Location] - Longitude'. Set the other column headings to empty values and use the red 'del' button to remove them. Click 'Save Import Template'.
Find this Import Template in the list of Import Templates and click the green 'run' button. Check if the columns have been assigned correctly and click 'Next'. After the import has processed all the rows, you can go to the Data section of your environment to inspect this data.
Working with the Gazetteer
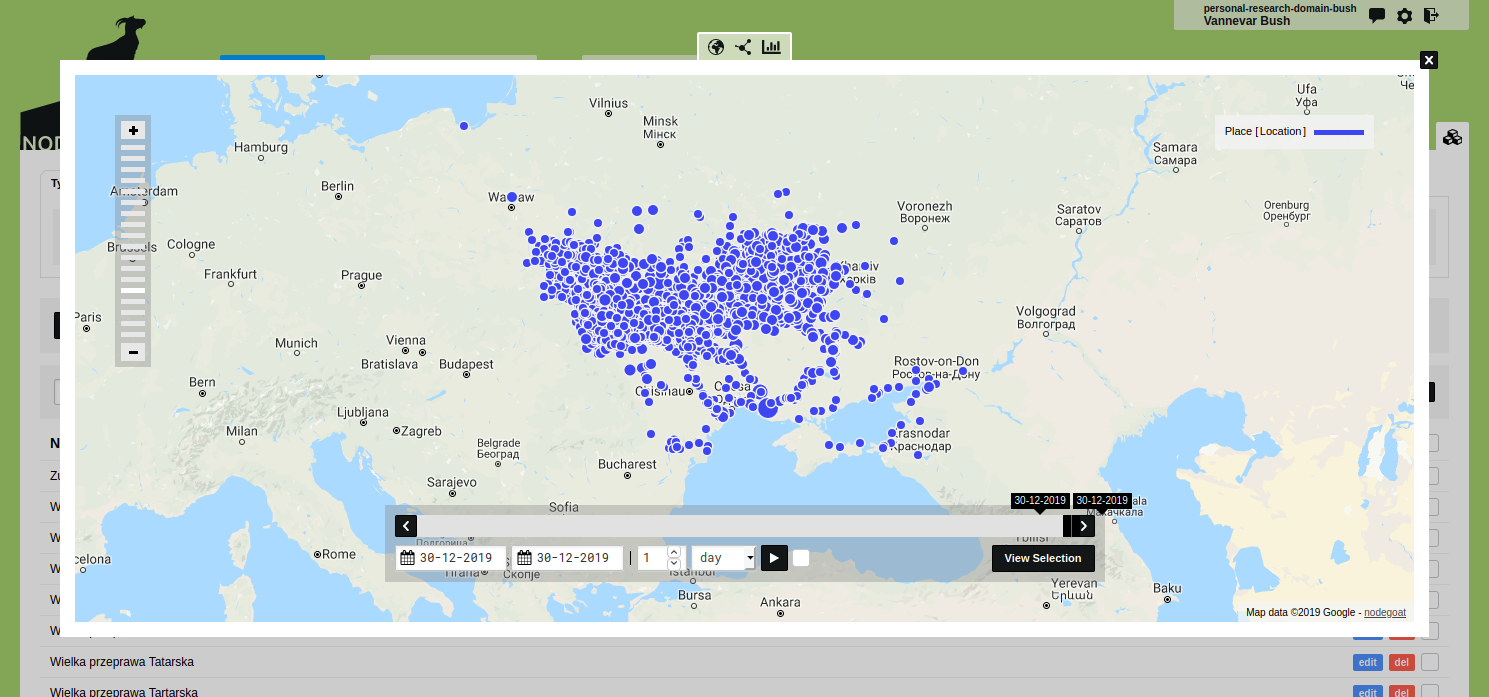
In the Data section of your environment you can go to the Object Type 'Place' and run the geographic visualisation to display the imported data on a map. This is a good way to check if all the data came through correctly.
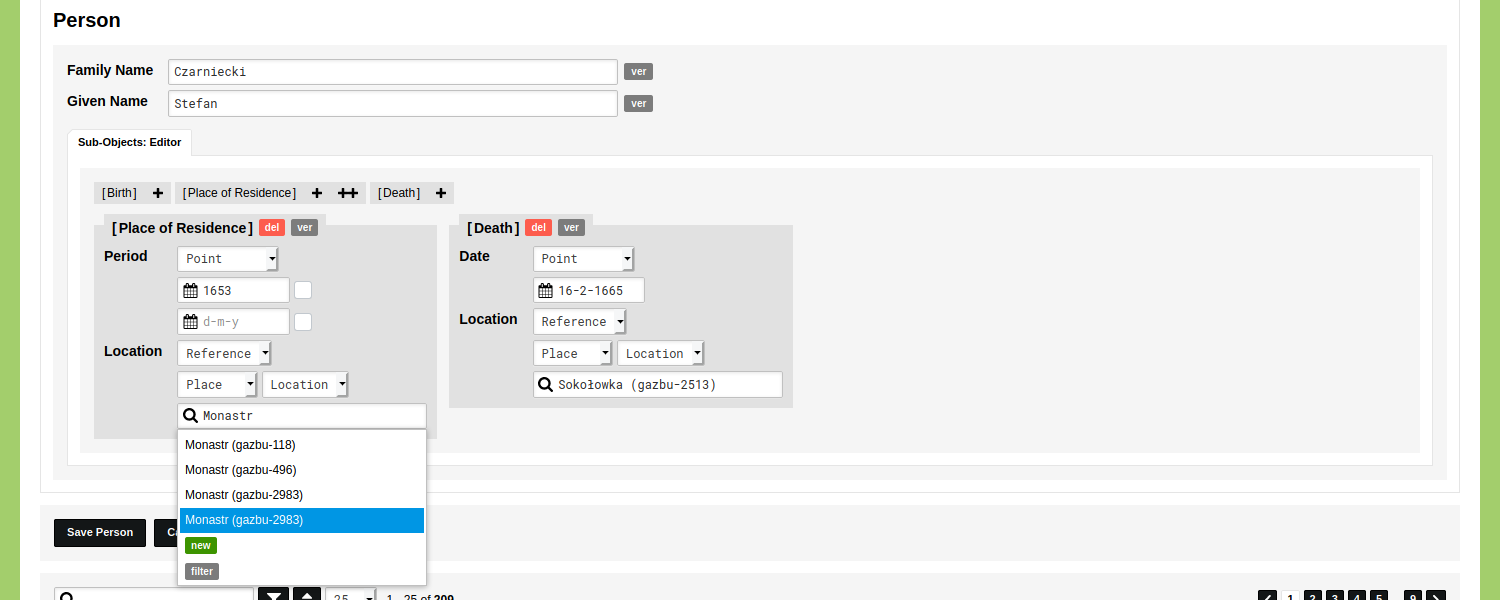
You can use this data to geocode other data. Go to the Object Type 'Person' and click 'Add Person'. Enter a family name and a given name and go to the Sub-Objects editor to specify the Place of Residence for this person. Set the location option to 'Reference' and change the Object Type to 'Place'. You can now start to type in the input field with the magnifying glass to select a location from your imported gazetteer.
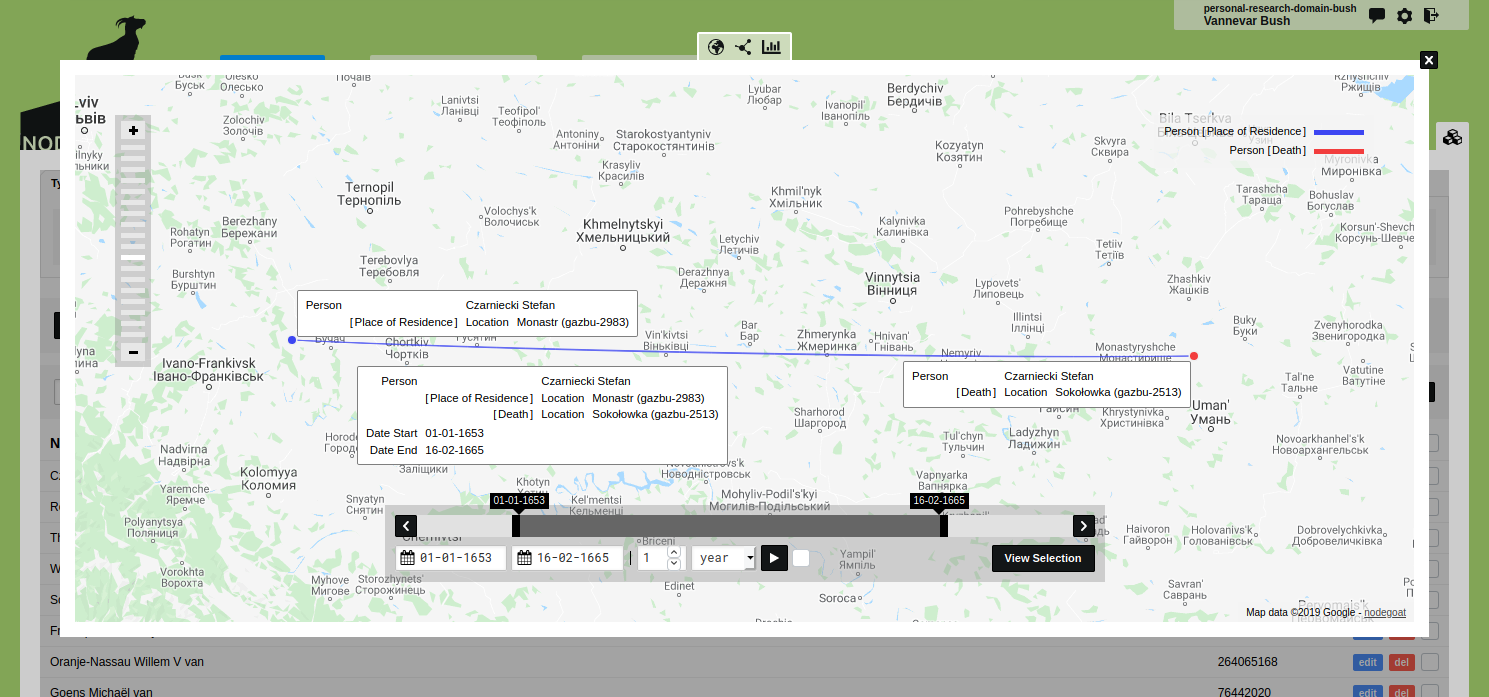
Click 'Save Person' and run the geographic visualisation to inspect this data on a map.
Specifying the License
The Gazetteer of Beauplan’s Ukraine has been published under a Creative Commons Attribution 4.0 license, which means that a reference to the source has to be made plus a link to this license. You could do this for the complete dataset by adding this information as an Object Definition for the Object Type 'Place', and use this whenever you include any of this data in a publication.
You can also store the license information for each Object individually. This approach allows you to use the Type 'Place' as a general gazetteer that contains data from various imported sources with different licenses. You could also add new data to this Object Type, if some locations that you need in your project are missing.
Use the 'multi change' functionality to add this license to each Object. Go to the Object Type 'Place' and click the grey 'multi' button that is displayed in the top right corner of the overview of Objects.

Click the blue 'c' button to open the multi change dialog. Use the dropdown menu to select the 'License' Object Description. Enter the license information in the input field. You can use the suggested citation that is provided on the project page:
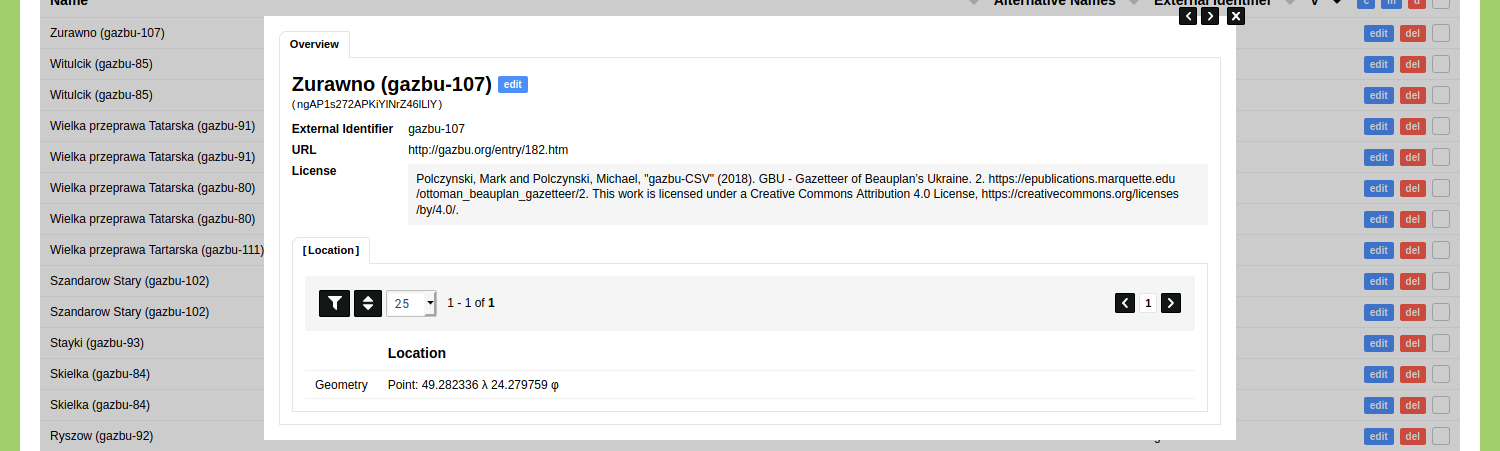
Polczynski, Mark and Polczynski, Michael, "gazbu-CSV" (2018). GBU - Gazetteer of Beauplan’s Ukraine. 2. https://epublications.marquette.edu/ottoman_beauplan_gazetteer/2. This work is licensed under a Creative Commons Attribution 4.0 License, https://creativecommons.org/licenses/by/4.0/.
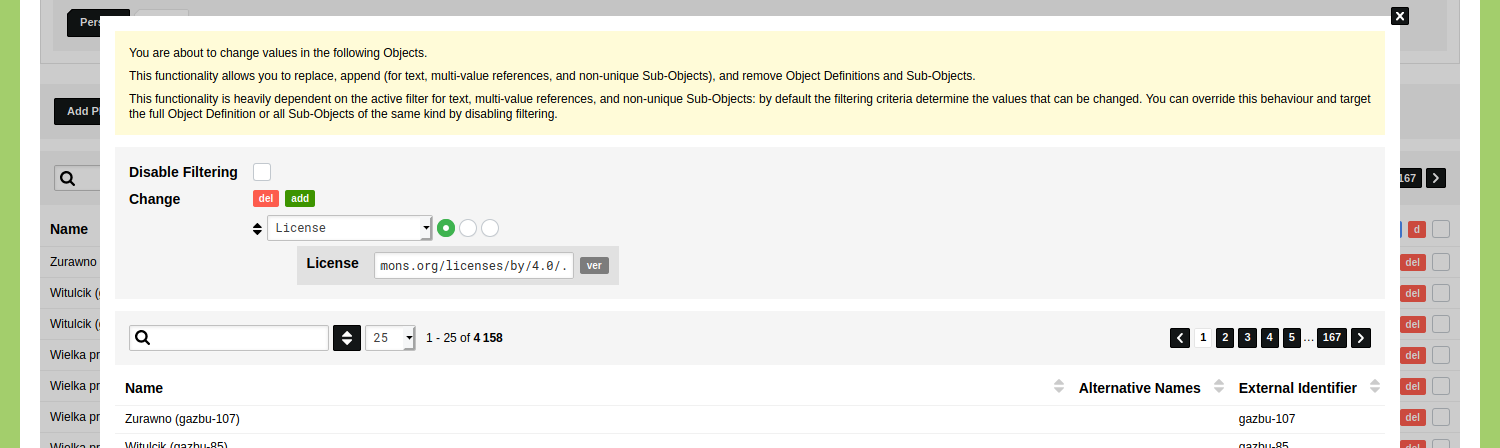
Click 'Change' and click 'OK' to apply this change to all the Objects of this Type.
Open a single Object to inspect the results. You will see that the license has been added as text and that the links are clickable.