Save and Open Filters
As you are combining various parameters to construct elaborate filters, you might want to save a configuration in order to reuse this later. To do this, you can click the blue 'save' button in the top left corner of the filter dialog. You can either choose to overwrite an existing filter, or select an empty value (this is the default when you have not saved a filter before) and click the green 'save' button to enter a name and a description. Keep the 'Scope' option to 'Project'. The 'Personal' and 'Administrator' options are only useful when you use nodegoat in a collaborative project.
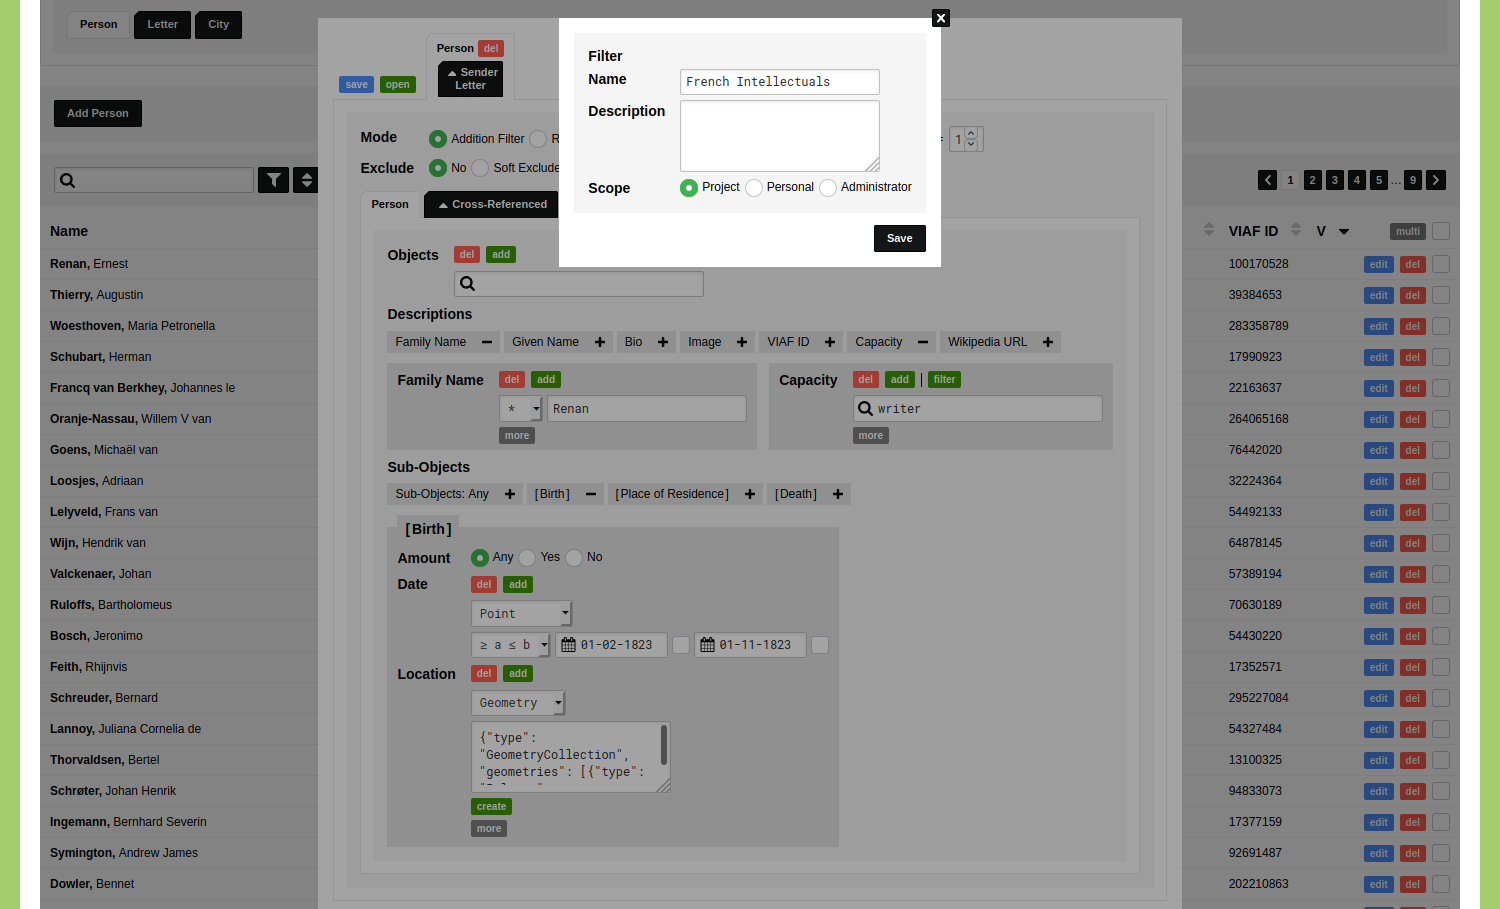
Click the 'Save' button to save the filter. You will see the name of this filter now appear in the list of stored filters. This filter is now available whenever you click the green 'open' or 'filter' button to access filters in this Type.
Using Stored Filters
Once a filter has been stored, you can use this filter to configure various other settings. You can use this filter, for example, to limit the Objects that are visible in this project. To do so, go to Management and go to Projects. Click the blue 'edit' button for this Project. Click on the tab 'Organise' and click the tab of the Type for which you have made this filter. In the drop-down menu next to the label 'Filter', you can now select the stored filter. After you have saved the project, only the Objects that are shown in this filter are visible in this project.
You can also use this filter when applying Conditions. The guide on how to modify your Object names describes how to apply these conditions to all the Objects of a Type. You can also use the blue 'filter' button there to open the filter functionality to either create a filter, or to open a previously stored filter. When a filter is selected, the conditions are only applied on Objects that are selected by the filter.