Filter on Locations
Since most of your spatial statements will be stored in Sub-Objects, this guide will demonstrate how to create spatial filters by means of Sub-Objects.
Go to the Object Type 'Person' and open the filter by clicking the funnel icon displayed above the list of objects. Under the Descriptions you will find the Sub-Objects that have been defined in this Type. You can use these Sub-Objects to construct your spatial filters. By means of the 'Sub-Objects: Any' filter element, you can set filters that target all the available Sub-Objects.
Click on the plus icon next to the Sub-Object 'Birth' to open the filter element of this Sub-Object. This guide covers the options for the 'Location' section of this filter element. The guide Filter on Dates covers the 'Date' section of this filter element.
The 'Location' section has two parts that you can use to configure the filter: two buttons to add or remove input fields, and a drop-down menu to specify the kind of location filter. Based on the kind of location filter that has been specified, additional parts are shown.
Location Reference
This is the default option and allows you to filter on references that have been used to assign a location to a Sub-Object. In the data model of this Object Type 'Person' the Object Type 'City' has been set as the default Object Type to be used for location references. This has been covered in the guide on how to create your first Type. Objects of the type 'City' have been used to assign location references to the Sub-Object 'Birth'. This has been covered in the guides on how to enter your first data and on how to import ambiguous relational data.
Because of these configurations, you can now make a reference filter, just like the one that has been covered in the guide on reference filters. Start typing in the input field with the magnifying glass and select an Object of the Type 'City'. After you've selected a reference, apply the filter to see the results.
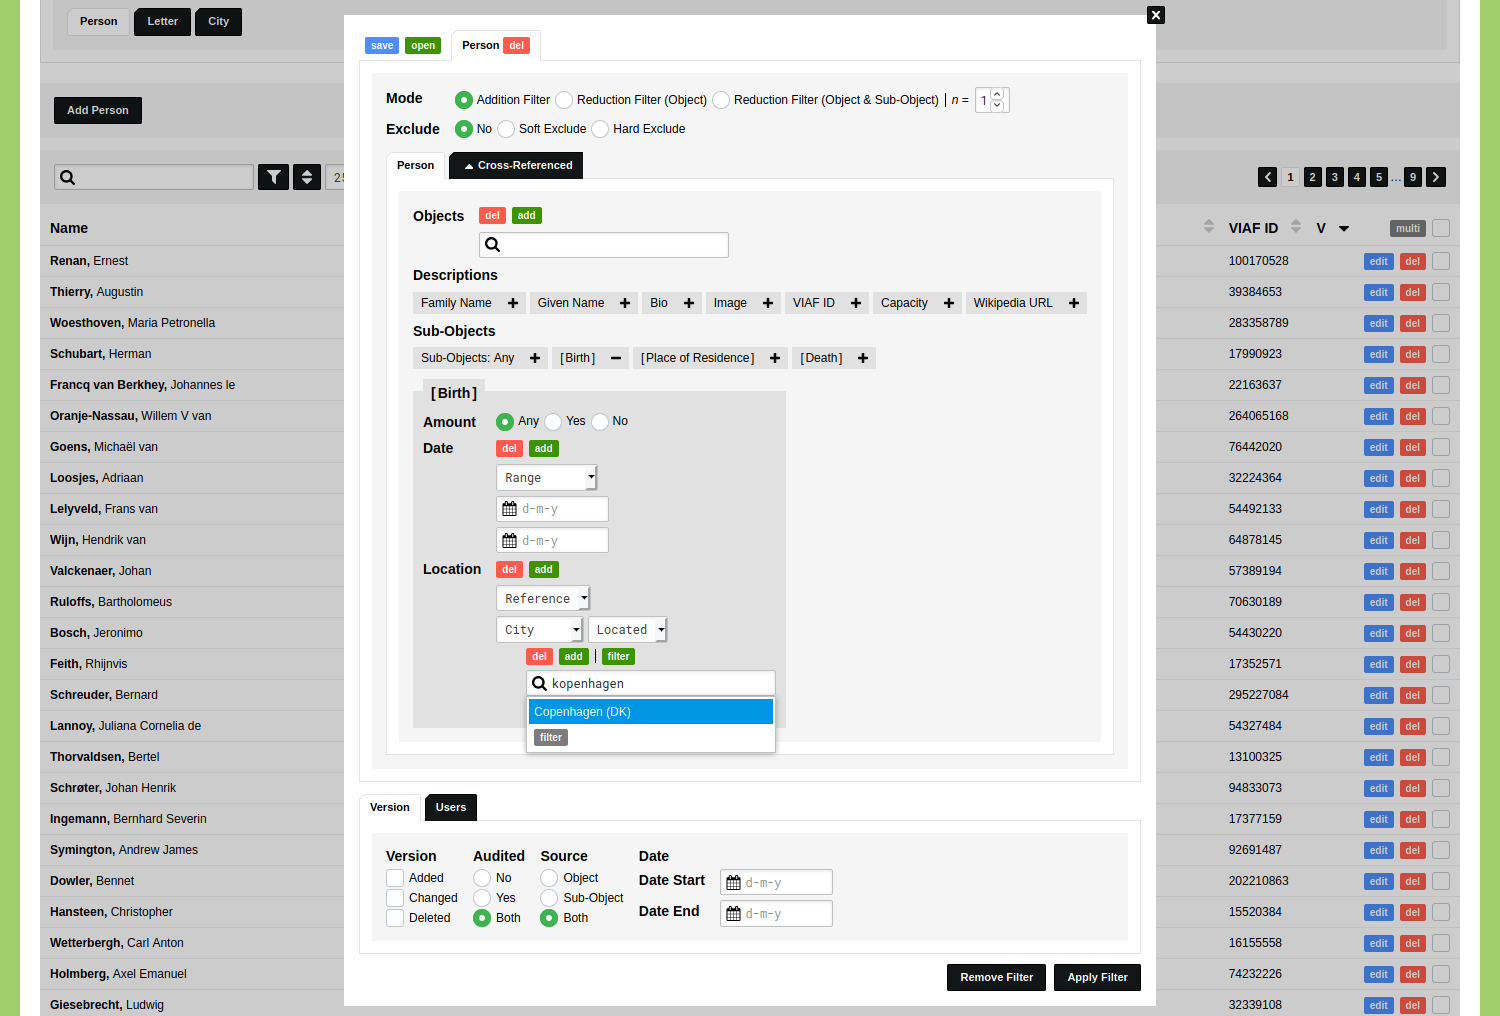
The results will show all the people who were born in the city of Copenhagen. You can run the geographic visualisation to see these results plotted on a map.
Location Geometry
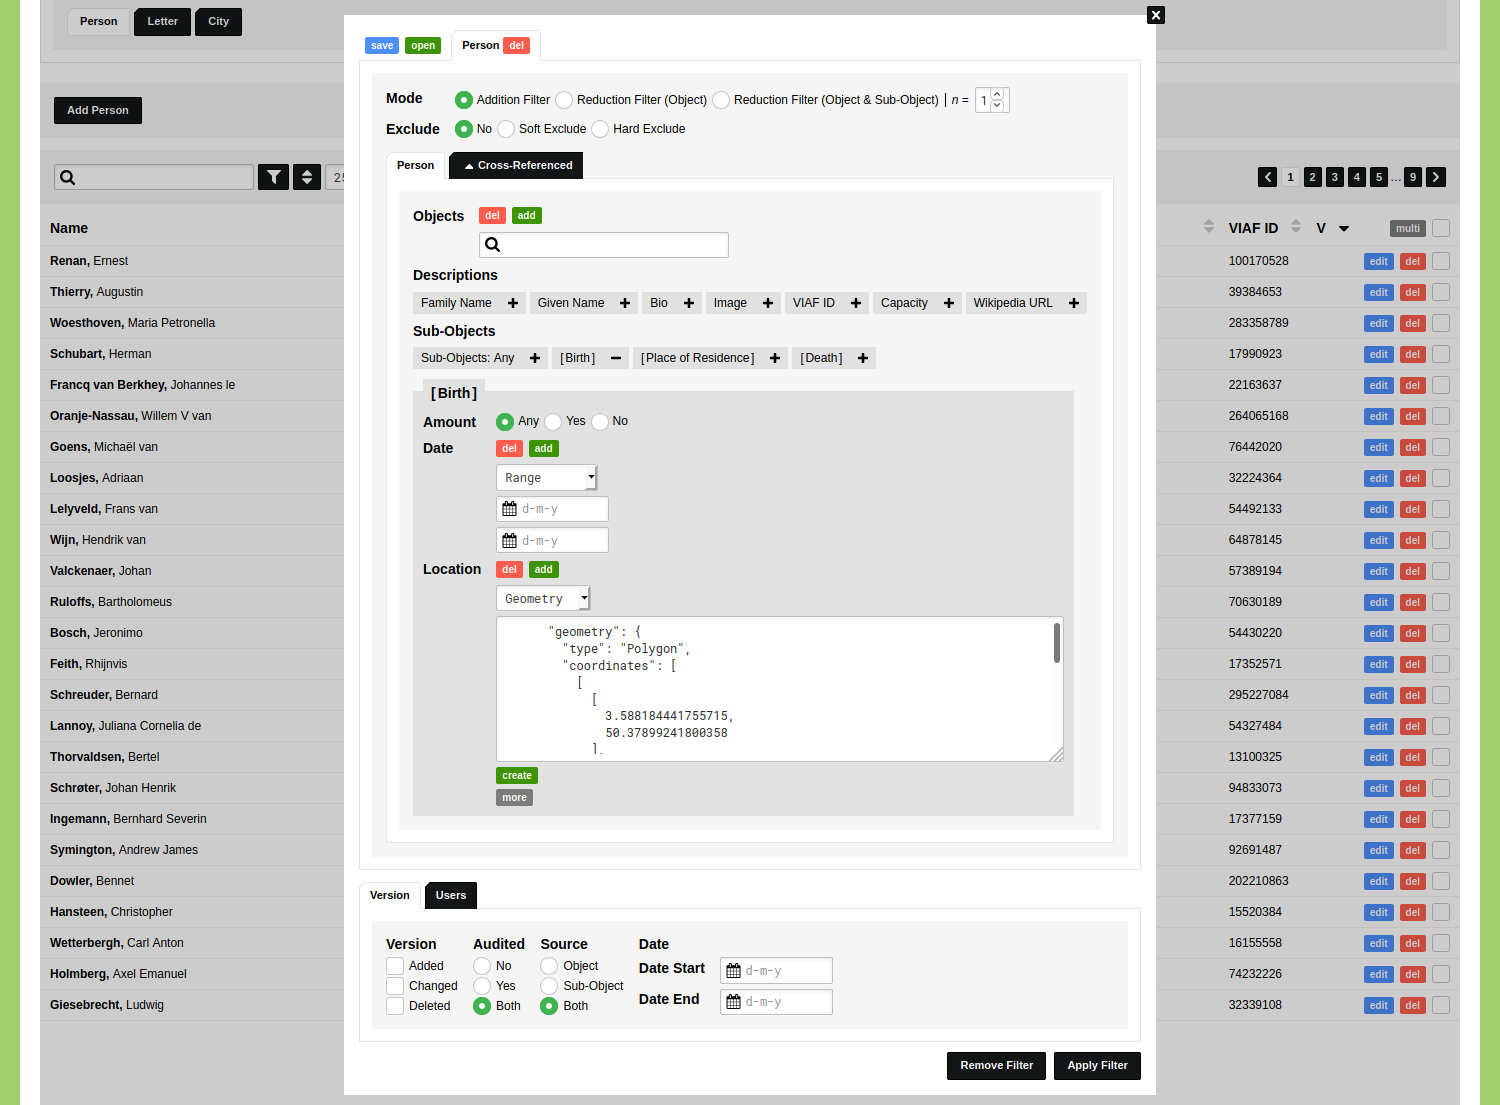
The second option in the list of location filters is 'Geometry'. After you have selected this option, you have the ability to paste in geometrical data in the GeoJSON format. You can either use pre-existing geometry data or create your own. You can create your own geometry data by clicking the green 'create' button and using the geojson.io service. Use the polygon option to draw an area that you want to use as filter.
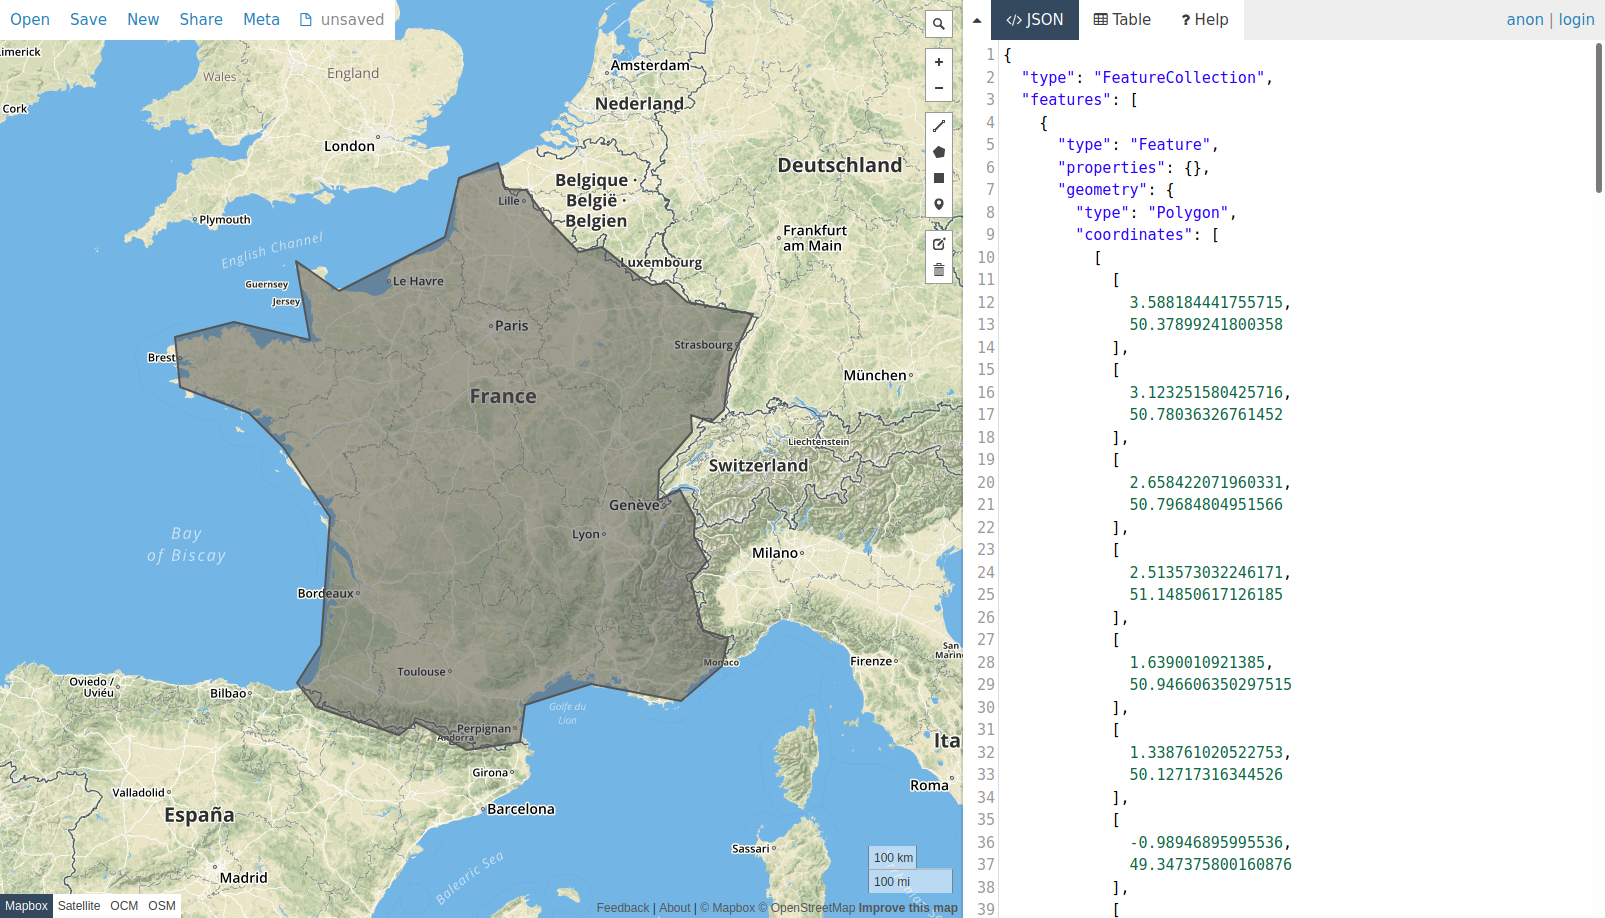
Copy the geometry data that is generated and paste this in the input field of the location filter.
The results will show all the people who were born in a city within the area of modern day mainland France. You can run the geographic visualisation to see these results plotted on a map.
To find Sub-Objects that lack a location, click the grey 'more' button and select 'Empty'.
Location Point
The last option allows you to filter on latitude and longitude values. While this might sound as a not very useful option at first, the green 'map' button allows you to select a location on the map, while the grey 'more' button here allows you to set a radius in kilometers. By means of these parameters, you can filter on people who were born within 50 kilometers of Copenhagen.