Export Data as a CSV file
There are two buttons in the toolbar that allow you to control your exports: the ('Export') icon that collects the data and generates a file, and the ('Export Settings') icon that allows you to configure the settings of the export. This means that you will usually first open Export Settings to configure your export and then click the Export button to run the export. In this guide we will export Objects of the Type 'Letter' as a CSV file.
Go to the Data section of your environment and go to the Object Type 'Letter'. If you want to export a subset of your data you can first run a filter. The currently active selection of Objects will be exported.
Click the ('Export Settings') icon next to the ('Export') icon. Go to the second tab 'Format' to specify the format of the export. Set 'Format Type' to 'CSV (Comma Separated Values)'. Set 'Include Descriptions' to 'Yes' in order to generate a first row of column headings that corresponds with the names of the exported Descriptions. Change the 'Separator' and 'Enclose' characters to a value of your choice, or keep the default options.

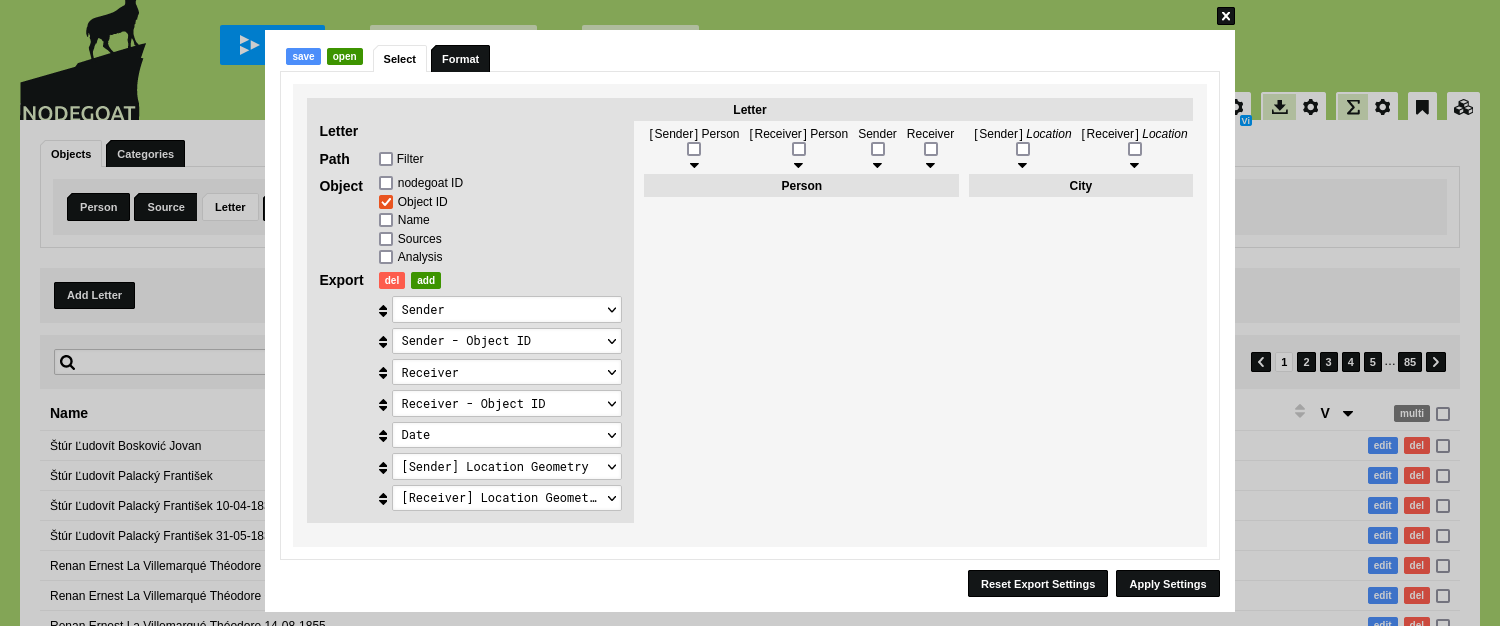
The first tab 'Select' allows you to select the elements of your data model that you want to include in the export. The name at the top of this overview indicates the Object Type that is currently active ('Letter').
Use the options at the left side of this dialog to configure the export settings of the Object Type Letter.
The 'Filter' option that is listed next to the 'Path' label can be selected when a filter is active that limits multiple Object Descriptions or Sub-Objects of the Object Type Letter. For this export you can leave this option unchecked.
The options that are listed next to the label 'Object' allow you to specify what data you want to export for each Object.
- nodegoat ID: a unique identifier that is unique across all nodegoat installations.
- Object ID: a unique identifier that is unique on your nodegoat installation.
- Name: the Object name. This can be a fixed field or a name generated based on Object Descriptions and Sub-Object Descriptions.
- Sources: Object IDs and values of Source References.
- Analysis: currently active Analysis values.
For this export you only check the 'Object ID' option.
Use the dropdown menu next to the label 'Export' to select an element of your data model that you want to include in this export. Click the green 'add' button to add more options. If you want to remove an option: set the dropdown menu to an empty value and click the red 'del' button.
You will see that for every Description that is a reference you select both the name of the Object that is referenced, or the Object ID of the referenced Object. For Location References you can select the name of the referenced Object, the Object ID, or the geometry value.
In this export we want to export the Object ID and name of the sender, receiver, plus the date of the letter and the geometry values of the sender and receiver locations. To do this, click the green 'add' button six time.
Set the first dropdown menu to 'Sender' and the second to 'Sender - Object ID'. Repeat this for the Receiver. Select the Object Description 'Date' and select '[Sender] Location Geometry' and '[Receiver] Location Geometry'.
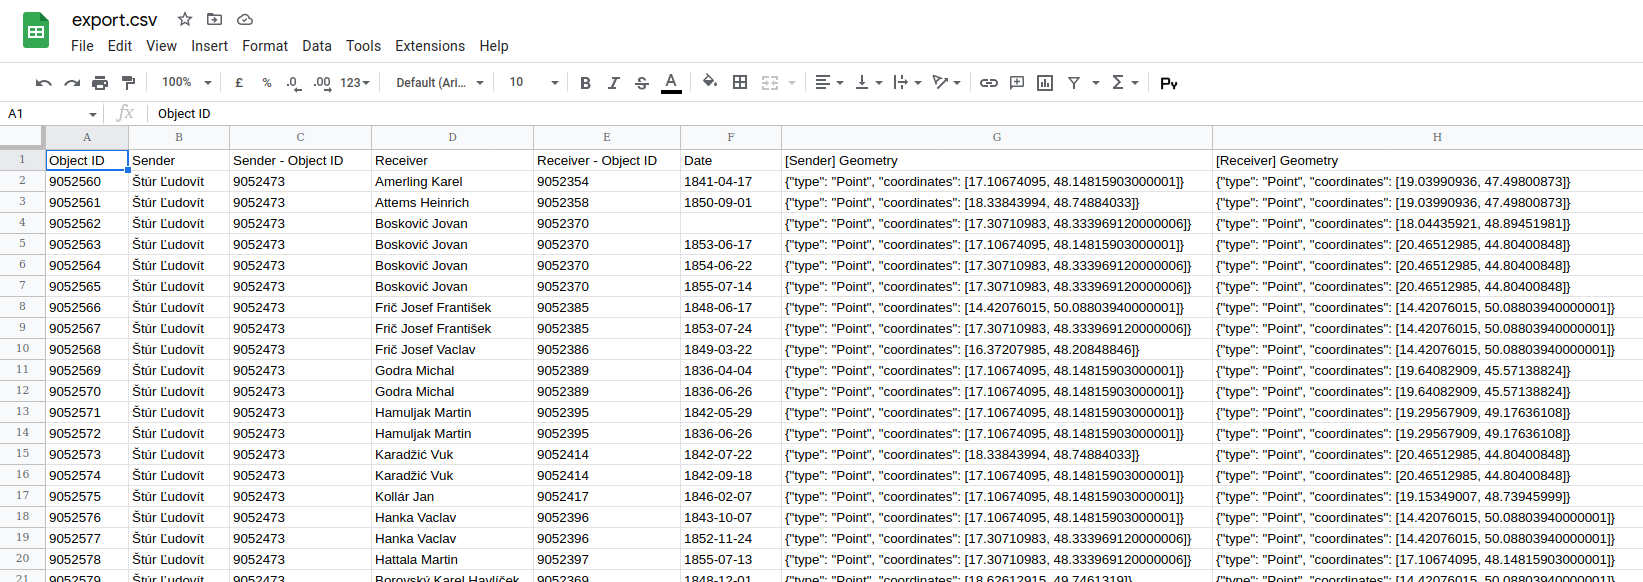
Click 'Apply Settings'. Click the ('Export') icon in the toolbar to run the export. The CSV file will be downloaded to your hard drive and can be opened in any application that can process CSV files, or can be stored in any data repository.
Exporting 'multi' Elements
Object Descriptions that have been configured to contain multiple values, or Sub-Objects that are not set to 'Single', will generate multiple rows in an export. This output allows you to generate a complete export of an Object of an event including all the Object IDs of the people who have been referenced as participants.
If you have configured an Object Type 'Person' with an Object Description 'Capacity' that has the 'Multiple' option enabled, an export of this data might lead to multiple rows per person. If you want to avoid this, it is recommended to first export the singular data and run separate exports for all the 'multiple' elements. This approach produces a clean export of your data with relationships that can be imported in other applications or stored in data repositories.