Add a Classification
Classifications contain Categories. Categories are 'labels'. This means that a Classification can best seen as a list of labels. Next to this semantic definition of Classifications, there is also a functional definition: Objects of a given Object Type can contain Sub-Objects to be contextualised in time and space, Categories in Classification cannot contain Sub-Objects.
Classifications are best to be used to label Objects with statements that are made about the Object by an observer. In a dataset of paintings, a classification can be used with categories like 'impressionism', 'pointillism', 'cubism', 'expressionism, 'surrealism' to classify the paintings. Since you are free to structure and enter your classifications and categories, you can use your own categories or use existing vocabularies/standard.
We will create a Classification called 'Capacities' with which we can categorise people (e.g. Jacob Grimm was a philologist, so we can give him the capacity 'philologist').
Go to Model and go to the tab 'Classification'. Click 'Add Classification'. You only have to define the name of this Classification, so just enter 'Capacity' in the 'Name' field.

Category Name
Since a Category is nothing but a label, we only need one input field for the Name of a Category. This means you can use the default settings for a new Classification.

You are now ready to save your first Classification. Click 'Save Classification' to save your Classification.
Connect the 'Capacity' Classification to the 'Person' Object Type
You now need to establish a connection between the newly created Classification and the Object Type 'Person'. This connection allows you to classify the Objects of this Type with the newly created Classification. To do this, you edit the Object Type 'Person'. Go to the tab 'Object Types' in Model and click the blue 'edit' button for the Object Type 'Person'. Go to the tab 'Object' and add a new Object Description by clicking the green 'add' button above the list of existing Object Descriptions (just above 'Family Name').

You now have six Object Descriptions for this Object Type.
Define this newly created Object Description as 'Capacity' and use the drop-down menu to set the value type to 'Reference: Classification'. In the new drop-down menu that appears you can select the Classification you want to use. Since there is currently only one Classification available, the 'Capacity' Classification is already selected. Since people can have multiple capacities, check the first checkbox 'Possibility for multiple Definitions for this Description' to allow multiple values to be stored in this Object Description.

Click 'Save Object Type' to store the changes made to this Object Type.
As you saw in the Guide Create your first Object Type, Object Descriptions describe intrinsic or static attributes of an Object while Sub-Objects describe changing or contextualised attributes of an Object. If you store a capacity of a person in an Object Description, the statement will be true for the full duration of an Object. In this case it means that Jacob Grimm had a capacity from 1785 until 1863, his lifetime as defined in his Birth and Death Sub-Objects. This is fine as long as you use this classification as a means of categorising your Objects, and not to perform a statistical analysis to find out how many philologists where active in the year 1786. If you do want to know when a person had a specific capacity, you should store this statement in a Sub-Object.
Enable the 'Capacity' Classification in the Project 'Correspondence Networks'
Go to Management and to go Projects. Click the blue 'edit' button at the Project 'Correspondence Networks' to edit the Project you created earlier.
In the tab 'Model' you see that a new list with 'Classifications' has appeared. Check the checkbox in front of the newly created Classification 'Capacity' to enable this Classification in your Project.

Click 'Save Project' to store the changes made for this Project.
Add and Use the Categories of the Classification 'Capacities'
If you now go to Data, you see that you now have two tabs available: 'Objects' and 'Categories'. Go to the tab 'Categories' and click on the Classification 'Capacity'. Click 'Add Capacity' to add a new Capacity. Enter the Capacity 'Philologist' and press enter or return.
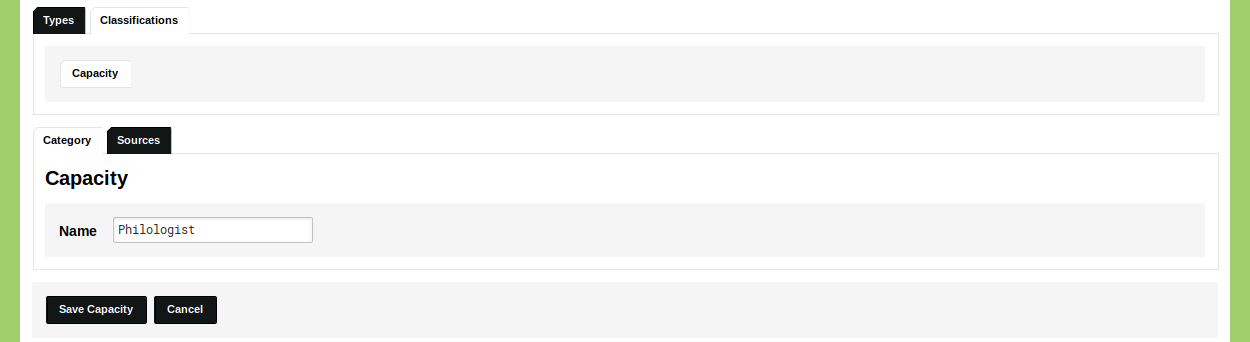
Now enter the Capacity 'Scholar' and press enter or return again. Do the same for 'Student', 'Civil Servant'. You now see a list appear of the added Categories in the Classification 'Capacity'.

Go to the tab 'Objects' and open the Object Type 'Person'. Click on the blue 'edit' button for the Person you just added, e.g. Jacob Grimm. You see that you now have a new Object Description available called 'Capacity'. If you put your cursor in the input field for this Object Description you see a list appear based on the Categories you just added. Click on one of these Categories to select it. Now select a second Category.
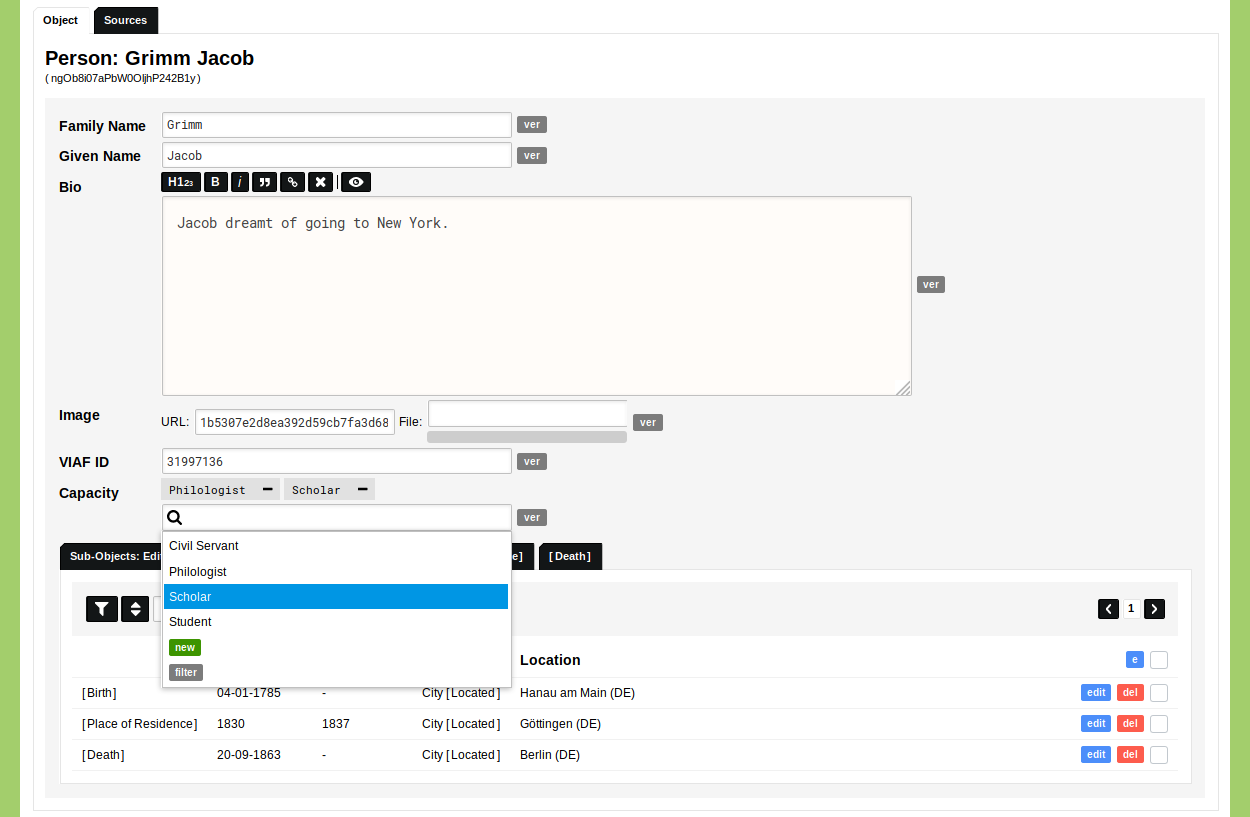
Click 'Save Person' to store the changes made to this Object.
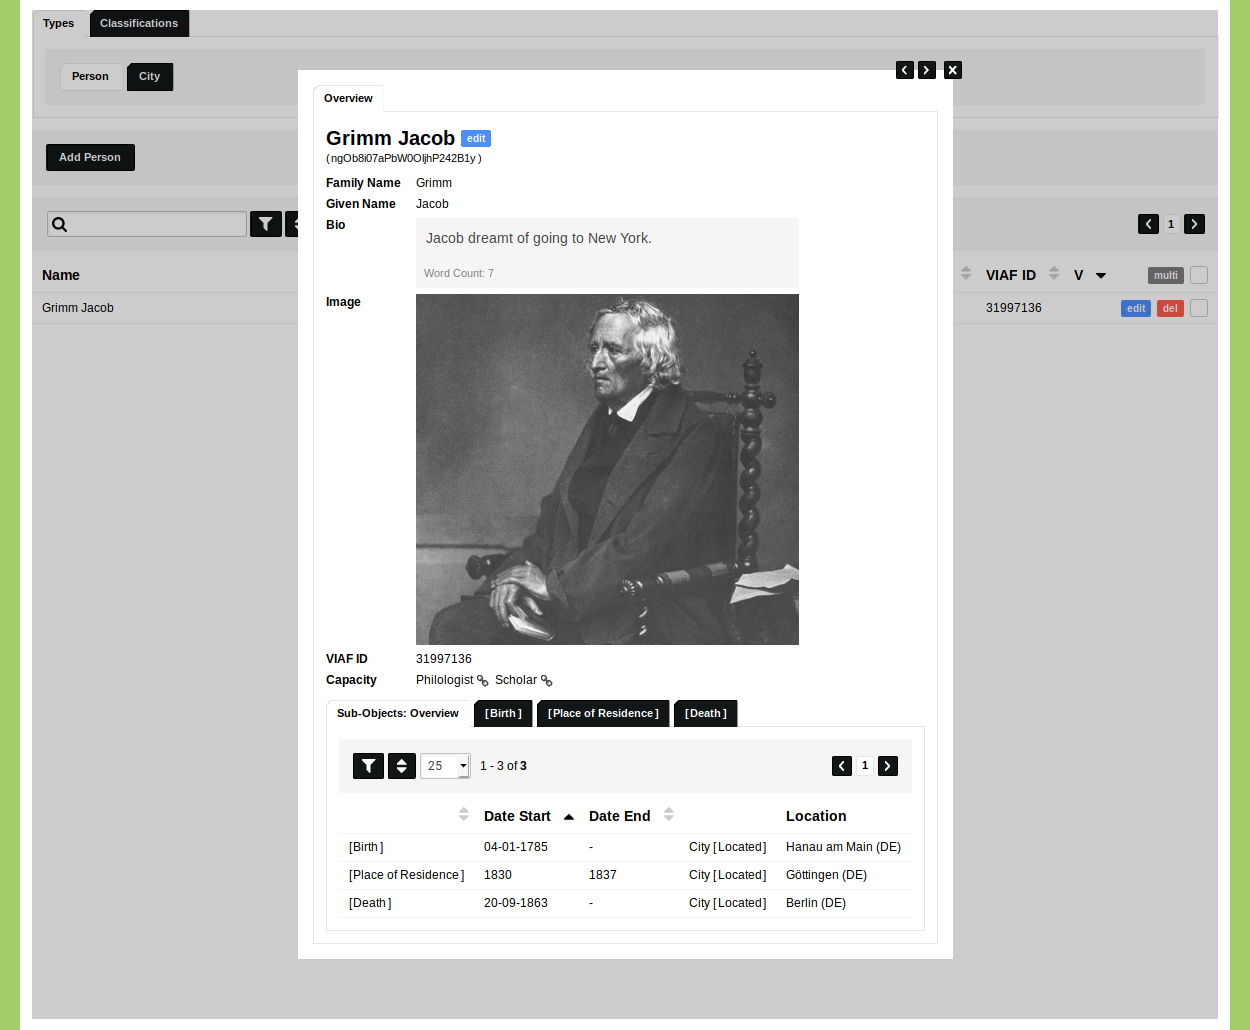
Click on the name of this Object to inspect the Object in view mode. You now see the added Categories as clickable links.
Click the icon to visualise this Object as a social network. The Social Network Visualisation is covered in the Guide Run the Social Network Visualisation.