Set Conditions to change the Colour of Nodes
The conditions functionality allows you to change the colour of nodes in a visualisation. Conditions can be set by means of filters to highlight one or a set of Objects in a visualisation. In order to understand how you can use the conditions, it is important to first get a good understanding of the filter functionality. Follow the Guides on how to create filters first.
Go to Data and go to the Object Type 'Letter'. Click the icon in the toolbar in the right top corner of your environment. This opens the 'Conditions' dialog with which you can specify conditional formatting rules for Names, Descriptions and Nodes in visualisations. In this Guide we will focus on the 'Nodes' tab.
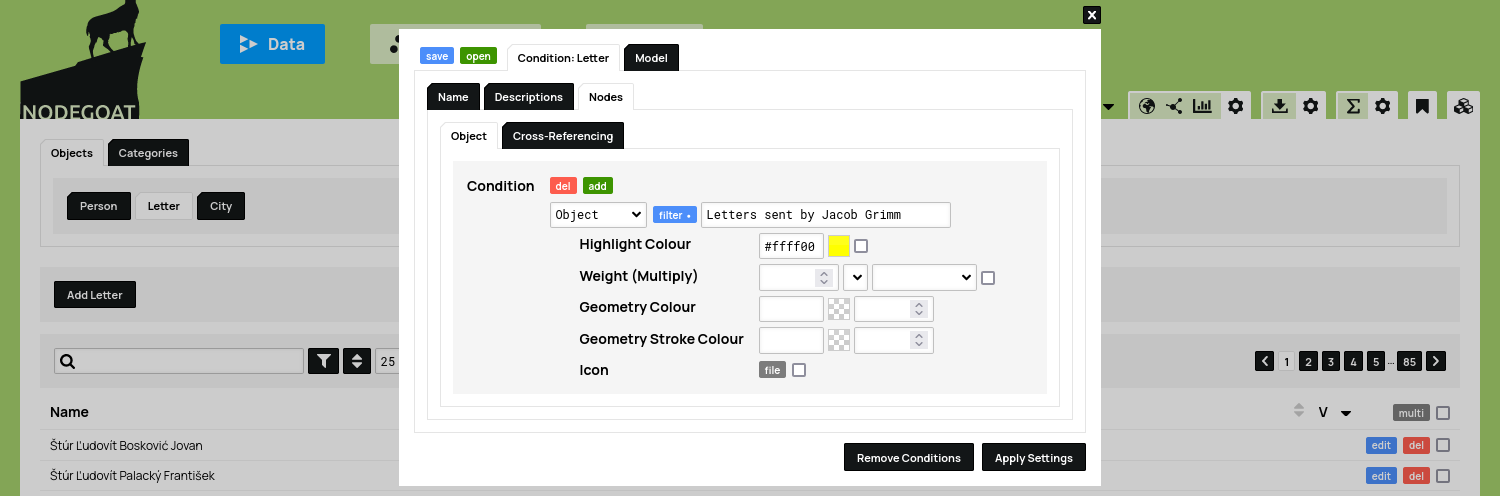
Per condition you can specify a filter (e.g. all Objects of the Type Letter that have 'Jacob Grimm' as a sender), a label (e.g. 'Letters sent by Jacob Grimm'), a highlight colour (a colour applied to the nodes), a Weight (an amount with which the size of the node will be multiplied), a geometry colour (a colour applied to the geometry area), a geometry stroke colour (a colour applied to the geometry stroke), and an icon (an SVG file displayed together with the node).
Highlight Objects
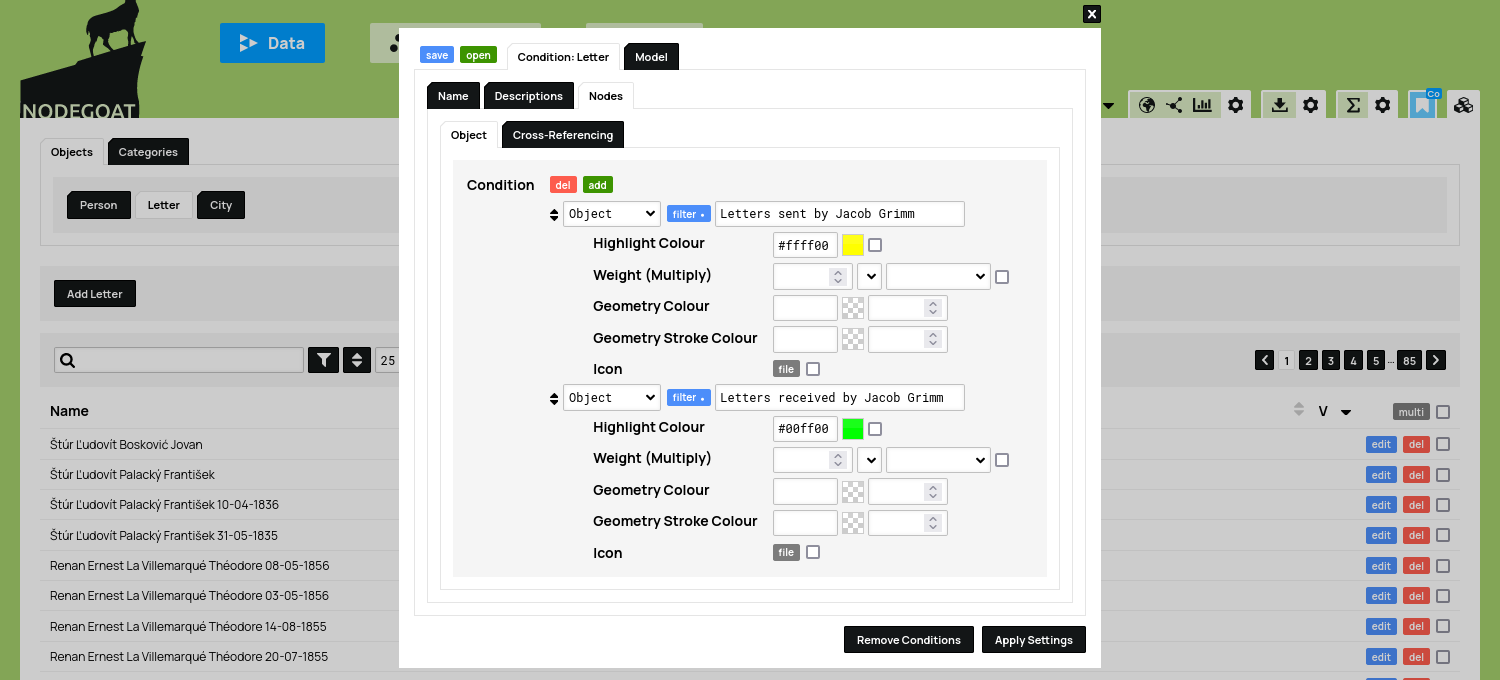
In the drop-down menu shown in the tab 'Nodes' you find the elements on which a condition can be applied: 'Object' and any available Sub-Object. To apply a condition to an Object you select 'Object' in this drop-down menu. Click the blue 'filter' button next to the drop-down menu to specify a filter. In this case we make a reference filter to find all Letter Objects that reference 'Jacob Grimm' in the 'Sender' Object Description. Click 'Save' to store this filter.
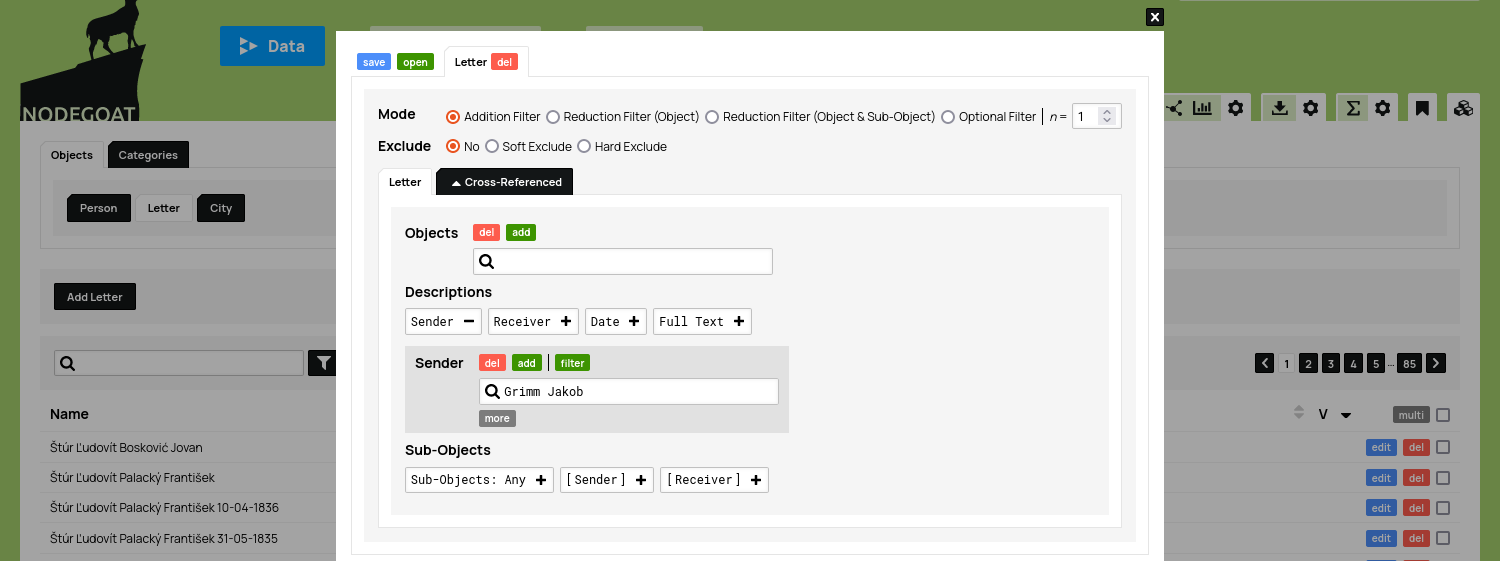
In the input field next to the blue filter button you can enter a text that will be displayed in the legend of the visualisation. Enter a text like 'Letters sent by Jacob Grimm' to describe the created condition. Use the colour picker of the highlight colour option to select a colour for this condition.
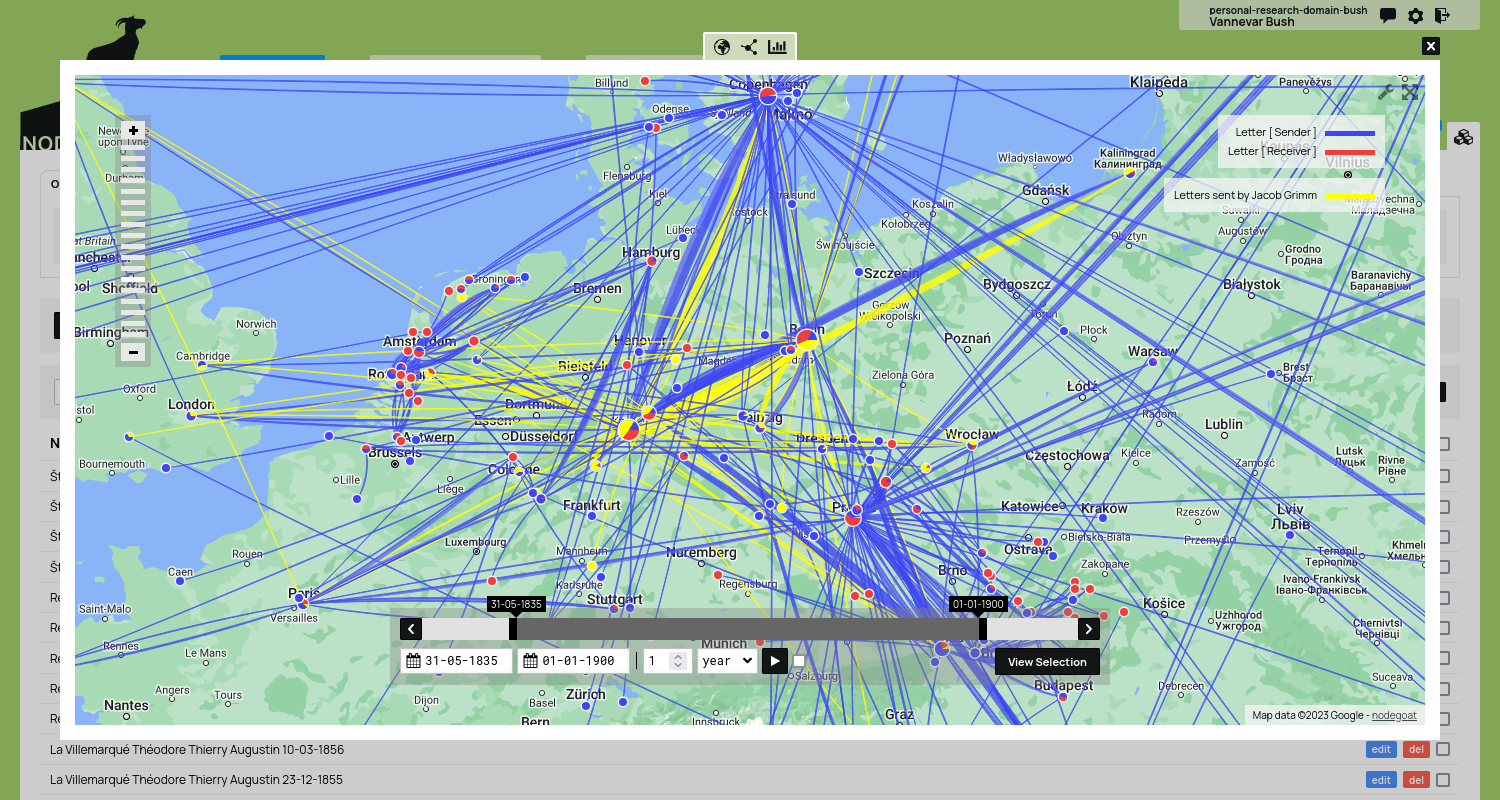
Click 'Apply Settings' and run the Geographic Visualisation by clicking this icon to see the Objects to which the condition applies highlighted on the map. The entered text is shown as a label in the legend next to the selected colour. Click the text or the colour to toggle the visibility of the conditioned elements. You can also switch to the Social and Chronological Visualisations to see the conditions being applied as well.
Highlight Sub-Objects
Instead of applying a condition to the complete Object, you can also target specific Sub-Objects. To do this you change the drop-down menu that we initially set to 'Object' to '[Sender]'. Click 'Apply Settings' and run the Geographic Visualisation again to see that now only the sending locations have been highlighted and not the receiving locations.
Combining Multiple Conditions
Set the drop-down menu of the 'Letters sent by Jacob Grimm' condition back to 'Object'.
Click the green 'add' button next to the label 'Condition'. A second set of options appears with which you can set another condition. Select 'Object' in the drop-down menu that has appeared. Click the blue 'filter' button to specify a filter for the second condition. Create a reference filter to find all Letter Objects that reference 'Jacob Grimm' in the 'Receiver' Object Description. Click 'Save' to store this filter. Enter the text 'Letters received by Jacob Grimm' in the input field next to the blue filter button. Use the colour picker of the highlight colour option to select a colour for this condition.
Run the geographical visualisation to see the two applied conditions.
When multiple conditions apply to the same Objects, checking the checkbox next to the highlight colour option 'Add value to default or previously set value' will ensure that multiple colours will be assigned to the same Object.
Cross-Referencing
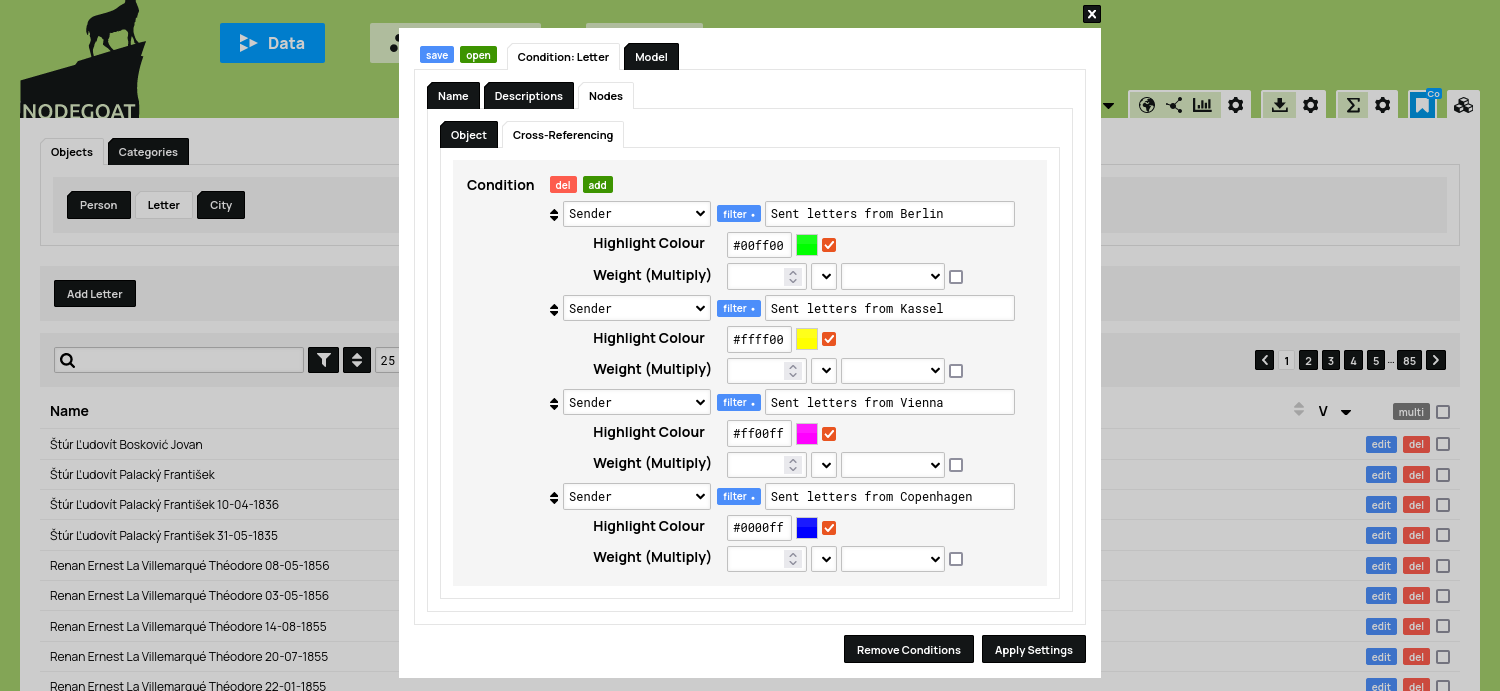
The conditions that have been described above target the Objects of the currently selected Object Type. Switch from the tab 'Object' (that has been opened by default) to the tab 'Cross-Referencing', to apply cross-referencing conditions. These conditions apply to Objects that are being referenced from the currently selected Object Type.
In the case of the Object Type 'Letter', you can apply conditions to Objects of the Type 'Person' that have been referenced from the Object Descriptions 'Sender' and 'Receiver'. You could, for example, colour Objects of the Type 'Person' based on the location from which they have sent letters.
To do this, use the drop-down menu to select the Object Description 'Sender'. Click the blue 'filter' button next to the drop-down menu to specify a filter. Click the '[Sender]' Sub-Object and set a Location Reference filter with the Object 'Berlin (DE)' from the Type 'City'. Click 'Save' to store this filter. Enter the text 'Sent letters from Berlin' in the input field next to the blue filter button. Use the colour picker of the highlight colour option to select a colour for this condition.
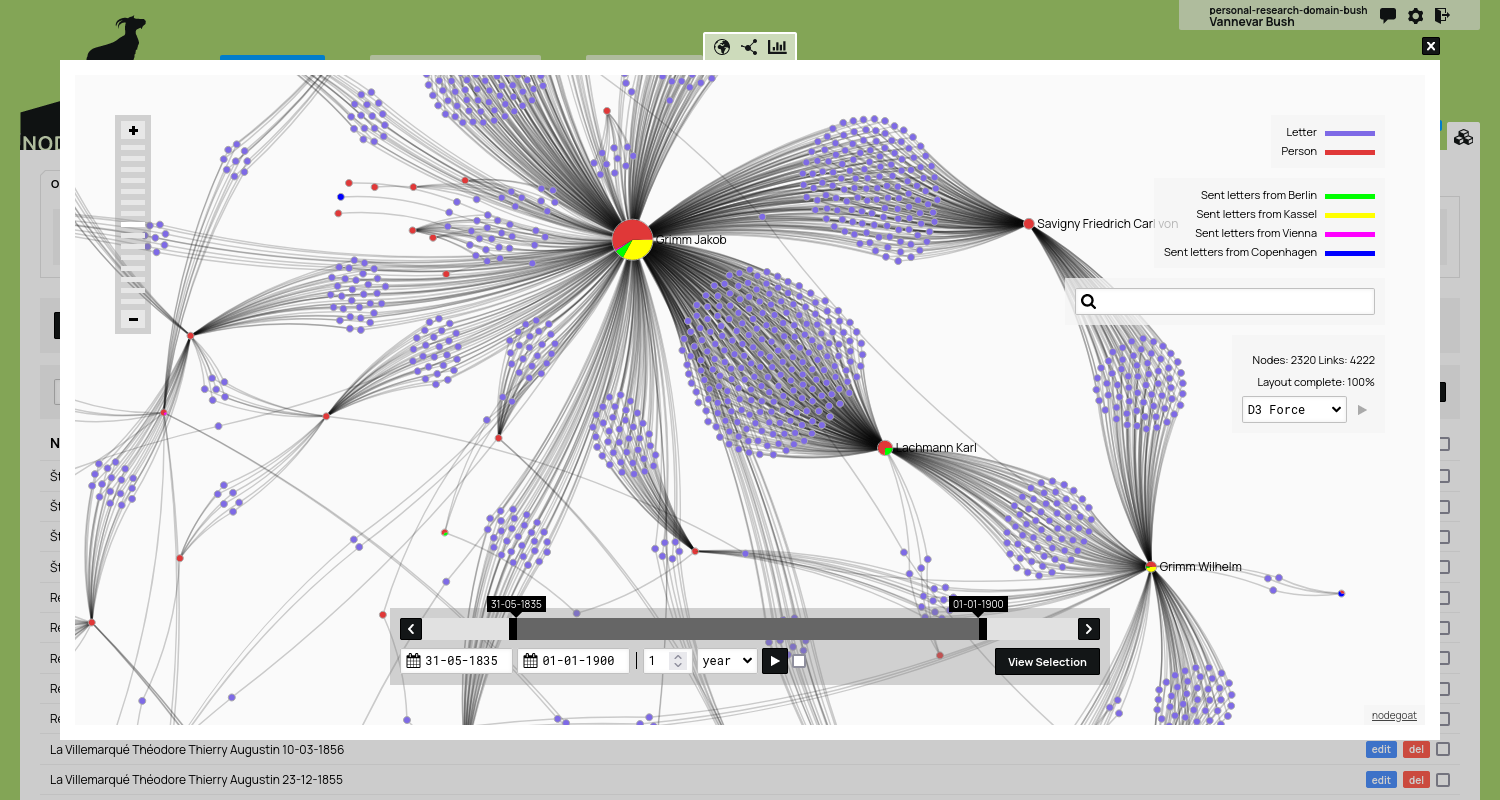
You can do this for one location, but you can also create multiple Cross-Referencing conditions that target different locations. When doing this, make sure to active the option 'Add value to default or previously set value' to ensure that multiple colours will be assigned to the same Object.
Click 'Apply Settings' and run the Social Visualisation by clicking this icon to see the Objects to which the condition applies highlighted. When multiple conditions apply to the same Object and the option 'Add value to default or previously set value' has been activated, a pie chart is generated based on the active conditions.